Blog

  • The Safe Way to Clean the Heating Element in an Airfryer

    The Safe Way to Clean the Heating Element in an Airfryer

    Maintaining an Airfryer supports safe operation and consistent cooking performance. The heating element can gradually collect grease, crumbs, and food splatter during regular use. 

    This guide explains how to access and clean the element gently without exposing electrical areas to unnecessary moisture. It also covers maintenance habits, materials to avoid, warning signs, and long-term care.

    Why Cleaning the Heating Element Matters?

    Grease and food particles can accumulate around the heating element and upper cooking chamber over time. Regular inspection and gentle cleaning help control smoke and odors while keeping airflow around the cooking area unobstructed.

    The Safe Way to Clean the Heating Element in an Airfryer

    Residue exposed repeatedly to high temperatures can produce burnt smells during later cooking sessions. 

    Removing accessible buildup also keeps old grease from becoming increasingly difficult to clean. Because the element is an electrical component, cleaning should remain gentle and controlled.

    Understanding Your Airfryer’s Heating Element

    The heating element is generally positioned above the basket inside the upper chamber of an Airfryer. Its location allows hot air to circulate around food while exposing the area to oil splatter and airborne crumbs.

    Many models use a metal heating assembly positioned behind or near a protective grill. Designs vary considerably, so access should always follow the specific appliance manual

    An official Philips product page provides one example of a current Airfryer design and model configuration.

    Preparation: What You Need Before Cleaning

    Gathering basic supplies first makes heating-element cleaning more controlled and reduces unnecessary handling. Choose gentle tools that can loosen residue without scratching or soaking electrical areas.

    The Safe Way to Clean the Heating Element in an Airfryer
    • Soft-bristle brush, such as a clean pastry brush
    • Damp microfiber cloth
    • Non-abrasive sponge
    • Mild dish soap
    • Small bowl of clean water
    • Flashlight for better visibility
    • Soft towel for protecting the countertop

    Avoid preparing large amounts of water because the heating section should never be soaked. Keep all cloths lightly damp, not dripping wet.

    How to Safely Access the Heating Element?

    Always unplug the Airfryer and allow it to become completely cool before cleaning. Remove baskets and detachable trays so the upper chamber becomes easier to inspect. Check the owner’s manual before changing the appliance position or accessing the heating area

    Some models can be carefully tilted or inverted for cleaning, while others should remain upright. Following model-specific instructions prevents unnecessary strain on components.

    Step-by-Step Cleaning Method

    A gradual cleaning process removes loose debris first before addressing greasy residue. Work slowly and minimize moisture near the heating element, fan, and other internal components.

    1. Remove Loose Debris

    Begin by examining the upper chamber for crumbs and residue around the heating assembly. Use a soft brush to loosen particles without pressing aggressively against the element. Let debris fall naturally rather than scraping it from delicate surfaces.

    2. Apply a Mild Cleaning Solution

    Mix a small amount of mild dish soap with water and dampen a soft microfiber cloth. Wring the cloth thoroughly before bringing it near the heating area. The goal is to soften grease without introducing excess moisture.

    Wipe accessible surfaces gently instead of spraying cleaning solution directly onto the element. For stubborn residue, hold the damp cloth briefly against the spot when the appliance instructions allow it. Repeat with light pressure rather than forceful scrubbing.

    3. Rinse and Dry

    Use a second cloth lightly dampened with clean water to remove soap residue from accessible surfaces. Follow immediately with a dry microfiber cloth to collect remaining moisture. Leave the appliance open until the cleaned area is completely dry.

    4. Check for Remaining Buildup

    Use a flashlight to inspect the upper chamber once the initial cleaning is finished. Look for grease, crumbs, or food residue that may remain around guards and nearby surfaces. Repeat gentle cleaning if necessary instead of using abrasive pressure.

    Extra Tips for Ongoing Maintenance

    Frequent light care can keep grease buildup from becoming difficult to remove. Cleaning the basket and checking the upper chamber regularly also makes deep cleaning less demanding.

    • Inspect the heating area periodically for visible residue.
    • Clean the basket and removable tray after each use.
    • Let the appliance cool fully before cleaning.
    • Use only cleaning products approved by the manufacturer.
    • Remove loose crumbs before they become baked onto upper surfaces.

    Using parchment liners may help with certain foods when the manufacturer allows them, but they must never obstruct air circulation or contact the heating element. Follow all accessory instructions carefully.

    What to Avoid While Cleaning?

    The heating area contains sensitive electrical and metal components that can be damaged by aggressive methods. Avoid excess moisture, sharp tools, and cleaners that are not approved for your appliance.

    • Abrasive pads or steel wool
    • Harsh chemical cleaners
    • Direct spraying onto the heating element
    • Steam cleaners
    • Soaking the appliance or heating section
    • Metal scrapers or sharp tools

    Never attempt to remove the heating coil unless the manual specifically identifies it as a user-removable component

    Forcing internal parts can cause damage or affect safe operation. Persistent buildup is better addressed with repeated gentle cleaning or qualified service.

    Common Heating Element Materials

    Airfryer heating elements may use heat-resistant metal alloys selected for repeated high-temperature operation. The exact materials and protective finishes vary between manufacturers and models.

    Stainless steel may appear in nearby guards or structural components, while heating coils commonly use specialized resistance alloys

    Regardless of material, abrasive cleaners can scratch or damage surrounding surfaces. Gentle maintenance protects both the element and adjacent finishes.

    Signs Your Heating Element Needs Cleaning

    Several visible or sensory changes can suggest that food residue has accumulated near the heating area. Inspect the appliance when smoke or burnt smells appear unexpectedly during normal cooking.

    • Visible grease or crumbs around the upper chamber
    • Persistent burnt odor during cooking
    • Smoke caused by old food residue
    • Darkened deposits near accessible heating surfaces
    • Loose food particles around the upper guard

    Some smoke may come from fatty foods rather than a dirty heating element, so consider the food being cooked before assuming maintenance is required. Persistent symptoms after cleaning may indicate a different appliance issue.

    Long-Term Maintenance Tips

    Regular attention to removable parts reduces the amount of splatter and debris reaching the upper chamber. A consistent inspection schedule also makes it easier to notice residue before it becomes heavily baked on.

    • Clean the basket and tray after each use.
    • Inspect the heating area periodically.
    • Wipe accessible upper surfaces when residue appears.
    • Store the appliance in a dry location.
    • Keep vents free from grease and dust.
    • Follow the manufacturer’s recommended cleaning schedule.

    If the element appears damaged, unusually discolored, loose, or unable to heat normally, stop using the appliance until it can be checked. Internal electrical problems require professional attention rather than household repair.

    Conclusion

    A clean heating element supports more reliable Airfryer operation and helps reduce burnt residue and unwanted odors. Unplugging the appliance, allowing it to cool, and using gentle cleaning methods protect sensitive components during maintenance. 

    Regular basket cleaning and occasional inspection of the upper chamber can prevent heavy buildup from developing. With a consistent care routine, an Airfryer can remain cleaner, easier to maintain, and ready for regular cooking.

  • How to Clear a Clogged Microwave Grease Filter at Home

    How to Clear a Clogged Microwave Grease Filter at Home

    Microwave range hoods save space, but their filters collect grease and residue over time. This guide explains how to locate, remove, clean, dry, and reinstall a clogged grease filter. 

    It also covers warning signs, cleaning frequency, replacement decisions, and preventive care. These steps can help maintain airflow, reduce odors, and support efficient appliance operation.

    How to Clear a Clogged Microwave Grease Filter at Home

    Understanding Your Microwave Grease Filter

    Most over-the-range microwaves have a metal grease filter underneath to trap airborne fats and cooking particles. These reusable filters are commonly made from aluminum or stainless-steel mesh.

    Grease filters need periodic home cleaning, although shape and mounting method vary by model. Use the appliance manual for specific maintenance directions.

    Identifying Filter Location

    The filter is usually on the microwave underside above the cooktop where the fan draws in air. Some models use one large panel, while others use two smaller filters.

    Sticky discoloration may indicate accumulated cooking grease. The owner’s manual should confirm the exact location and removal method.

    Why Grease Filters Get Clogged?

    Cooking releases oil particles and steam toward the exhaust system. The fan pulls them through the mesh, where grease attracts dust and food residue.

    Buildup can eventually block openings and reduce normal ventilation airflow. Cooking odors may also linger when the filter becomes heavily coated.

    Signs Your Microwave Grease Filter Is Clogged

    A clogged filter often causes noticeable performance changes. Check these common signs when deciding whether cleaning is needed.

    How to Clear a Clogged Microwave Grease Filter at Home
    • Lingering cooking smells remain after food preparation.
    • Yellow or brown stains appear across the mesh.
    • Suction feels weak near the ventilation intake.
    • Greasy residue collects around the exhaust vent.
    • The fan sounds louder while airflow stays weak.

    Preparing to Clean Your Grease Filter

    Simple household supplies make filter cleaning easier and help protect the mesh. Let the microwave and nearby cooking surfaces cool completely first.

    • Mild liquid dish soap without bleach
    • Hot tap water for loosening grease
    • A non-scratch sponge or soft brush
    • Lint-free towels for drying
    • A sink or basin for the filter panel
    • Rubber gloves for sensitive skin

    Detailed Step-by-Step: Clearing a Clogged Microwave Grease Filter

    Careful cleaning removes grease without bending the filter. Follow manufacturer instructions first when the manual provides model-specific directions.

    1. Removing the Filter Safely

    Turn the microwave off and consider unplugging it before touching the filter mounting area. Most filters slide from a slot or release from small tabs. Hold the edges and avoid forcing the panel because thin metal mesh can bend or nick fingers.

    2. Soaking the Filter

    Fill a sink with very hot water and mild dish soap to make a grease-cutting solution. Lay the filter flat and soak it for 10 to 15 minutes. For heavy buildup, extend the soak instead of using aggressive scrubbing pressure.

    3. Gentle Scrubbing

    Clean both sides with a soft brush or sponge using light circular motions. Work carefully around corners where sticky residue may remain. Avoid steel wool or sharp tools that could damage the filter mesh surface.

    4. Rinsing Thoroughly

    Run hot water through both sides until the soap and grease wash away. Rotate the filter so water reaches different mesh sections. Rinse again if it still feels slippery or shows visible detergent residue.

    5. Drying and Reinstalling

    Place the filter on a lint-free towel and let it air-dry completely. Check both sides because reinstalling it damp can introduce moisture into the ventilation area. Once dry, return it to position and confirm the panel sits securely.

    Extra Tips for Persistent Grease and Odors

    Stubborn buildup may need another cleaning cycle instead of stronger scrubbing. Use gentle cleaning methods and check the manual before trying alternative cleaners.

    • Add white vinegar to soaking water for stubborn grease and odors if permitted.
    • Try a 1:1 water-vinegar mixture for persistent buildup.
    • Use an old soft toothbrush for tight mesh corners.
    • Repeat the soaking cycle when residue remains.
    • Dry in sunlight when practical for extra odor reduction.

    How Often Should a Microwave Grease Filter Be Cleaned?

    Cleaning frequency depends on cooking habits, but regular filter checks make buildup easier to manage. Daily stovetop use may call for monthly cleaning, while lighter use may allow two or three months.

    Owners of a Samsung over-the-range microwave should follow the model-specific care guidance for their appliance. Clean sooner whenever sticky buildup, visible coating, or weak airflow appears.

    Replacement vs. Cleaning: Knowing When to Buy a New Filter

    Metal grease filters support repeated cleaning and reuse, but physical damage can require replacement. Inspect the cleaned filter to ensure its structure and fit remain sound.

    Consider replacement if:

    • The filter frame warps or no longer fits securely.
    • The mesh becomes torn or separates from the frame.
    • Heavy discoloration remains after thorough repeated cleaning.
    • Odors or weak airflow return despite proper filter care.

    Use the microwave model and filter part numbers when choosing a replacement. The manufacturer support site can help confirm compatibility.

    Preventive Tips for Longevity and Efficiency

    Small maintenance habits can reduce grease accumulation between deep cleanings. Keeping ventilation surfaces clean also helps slow residue buildup.

    • Wipe exterior vents and grille covers weekly when greasy.
    • Avoid spraying degreasers into ventilation openings.
    • Let pans cool slightly when practical to reduce vaporized oil uptake.
    • Run the fan during cooking and afterward to clear steam and particles.
    • Inspect the filter regularly for sticky surface buildup.

    Safety Reminders for At-Home Microwave Maintenance

    Careful handling protects both the user and appliance during cleaning. Prioritize owner’s manual instructions when they differ from general advice.

    • Never submerge the entire microwave unit in water.
    • Disconnect power before cleaning near electrical components.
    • Handle mesh carefully because metal filter edges may be sharp.
    • Reinstall the filter only when completely dry.
    • Follow local recycling rules for old metal filters.
    • Seek professional service for electrical faults, sparks, smoke, or serious problems.

    Conclusion: Key Takeaways for Maintaining a Clean Microwave Grease Filter

    Clearing a clogged microwave grease filter can restore better ventilation performance without complicated tools. Regular soaking, gentle scrubbing, rinsing, and drying help remove grease from everyday cooking. 

    Routine checks make it easier to recognize when cleaning or replacement is necessary. With consistent care and manufacturer guidance, the filter can support a cleaner kitchen environment.

  • How to Deep Clean a Dishwasher Filter for Better Performance

    How to Deep Clean a Dishwasher Filter for Better Performance

    Every dishwasher relies on a filter to capture food debris and residue before they interfere with normal operation. Over time, grease and particles can collect on the filter and reduce effective water movement. 

    This guide explains how to deep clean dishwasher filters safely, from removal and soaking to reassembly. It also covers filter types, warning signs, cleaning frequency, common mistakes, and routine maintenance tips.

    Understanding the Role of the Dishwasher Filter

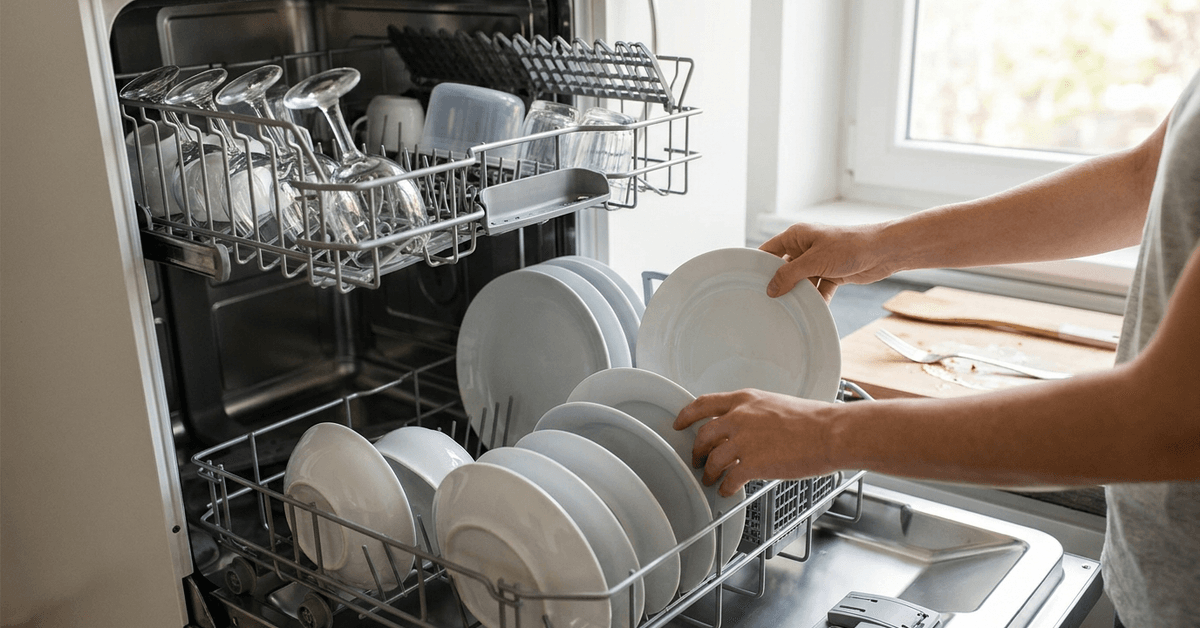
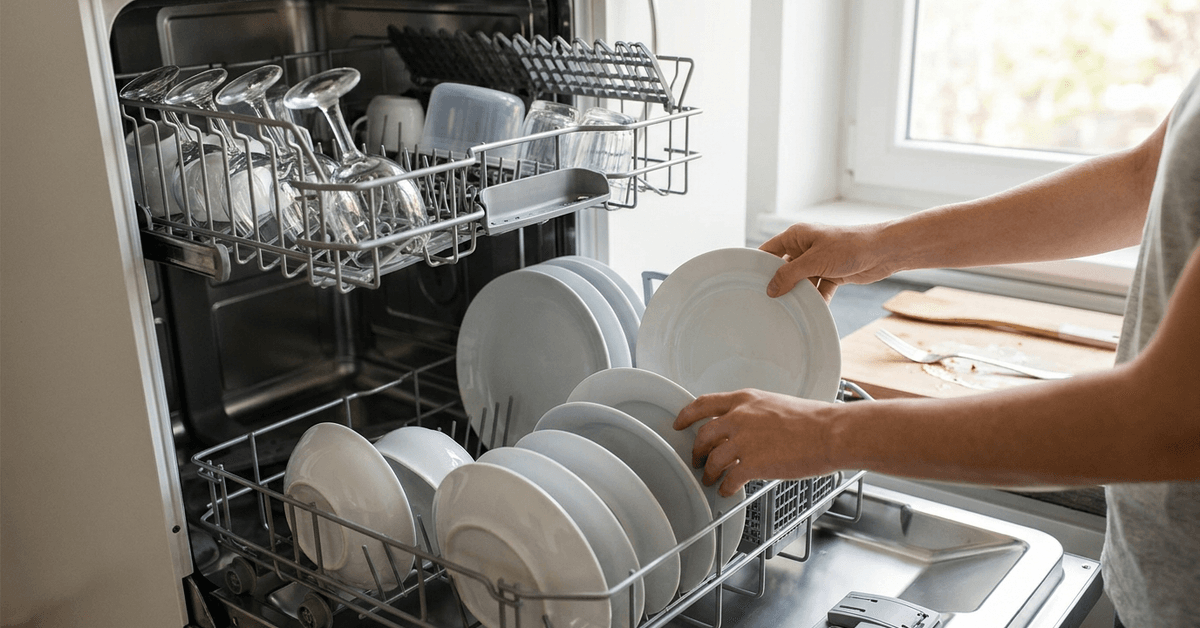
    The dishwasher filter screens food particles and debris from wash water and helps keep larger scraps away from internal components. 

    Most removable filters sit near the tub bottom, where they support cleaner wash cycles by trapping material before it recirculates.

    Image 1

    Types of Dishwasher Filters

    Dishwashers use different filter shapes, so the correct removal method depends on the model. Checking the manual first helps identify the specific filter system and prevents accidental damage.

    • Fine mesh filters: Capture small particles and need gentle cleaning.
    • Coarse cylindrical filters: Collect larger food pieces.
    • Flat plate filters: Sit across part of the tub base.
    • Combined filter assemblies: Use multiple removable sections.

    Why a Deep Clean Outperforms Quick Rinses?

    A quick rinse removes loose food, but oils, detergent residue, and hidden buildup can remain in mesh openings. Periodic deeper cleaning loosens this residue and supports consistent filtration performance without aggressive scrubbing.

    Signs Your Filter Needs Deep Cleaning

    Several symptoms can suggest routine rinsing is no longer enough. Inspect the filter when you notice recurring residue or odors after normal cycles.

    • Persistent food odors after a cycle
    • Dishes with visible residue
    • Slimy or greasy buildup on the filter
    • Food particles trapped in the mesh
    • Slower-than-usual drainage

    Step-by-Step Guide: Deep Cleaning a Dishwasher Filter

    Start with the manufacturer’s care instructions because filter designs and approved cleaning methods vary. A careful sequence protects the filter and surrounding components while removing buildup.

    1. Preparation and Safety Measures

    Prepare the dishwasher after the cycle has ended and the interior has cooled. Gather the basic cleaning supplies before removing parts.

    • Follow the manual for safe filter access.
    • Let hot surfaces and water cool.
    • Gather mild dish soap, a soft brush, microfiber cloth, and bowl.
    • Use vinegar only if the manufacturer permits it.
    • Avoid abrasive cleaners and metal tools.

    A current Bosch 800 Series dishwasher is one example where owners can consult model documentation before cleaning removable parts.

    2. Removing the Filter Unit

    Move the lower rack so the filter area is accessible. Observe how each piece sits before removal to simplify reinstallation.

    • Locate the filter near the tub bottom.
    • Follow the marked unlocking direction.
    • Lift removable sections gently.
    • Note the position of screens or cylinders.
    • Stop and check the manual if a part resists.

    3. Initial Rinse and Debris Removal

    Rinsing first removes loose scraps before deeper cleaning. Use warm running water and gentle pressure to protect fine mesh.

    • Hold the removable filter under warm water.
    • Remove food particles with a soft brush.
    • Clean separate removable sections individually.
    • Brush gently along mesh openings.
    • Avoid knives, wire brushes, and abrasive pads.

    4. Deep Cleaning Soak

    A short soak can soften grease and stubborn food residue that does not rinse away. Use mild soapy water unless the appliance instructions approve another solution.

    • Fill a bowl with warm water and mild dish soap.
    • Submerge filter parts approved for soaking.
    • Leave them for about 15 to 20 minutes.
    • Gently brush softened deposits.
    • Repeat if buildup remains.
    • Rinse thoroughly.

    5. Cleaning the Filter Housing Area

    While the filter is out, inspect the surrounding area for visible trapped debris. Clean accessible surfaces without disturbing pumps, seals, or fixed components.

    • Wipe the filter opening with a damp microfiber cloth.
    • Remove loose debris safely.
    • Use a soft brush around accessible corners.
    • Do not push objects into drains.
    • Leave seals and fixed parts in place.

    6. Reassembling and Testing

    Reinstall every part in its original orientation. A properly seated filter should sit securely without excessive force.

    • Rinse away all soap.
    • Return each section to position.
    • Lock the assembly as instructed.
    • Replace the lower rack.
    • Run a short rinse cycle if recommended.
    • Check for unusual noises or drainage problems.

    Common Mistakes to Avoid During Filter Cleaning

    Filter cleaning works best when it remains gentle and consistent. Avoid methods that can damage mesh, plastic, or seals or complicate reassembly.

    • Using steel wool or abrasive pads
    • Forcing a resistant filter
    • Skipping the manual before removal
    • Leaving debris beneath the filter
    • Using strong chemicals without approval
    • Failing to lock the filter securely
    • Ignoring damaged mesh or cracked parts

    How Often Should You Deep Clean a Dishwasher Filter?

    Cleaning frequency depends on appliance use and the amount of residue entering the tub. Regular inspection helps establish a practical cleaning schedule for your household.

    • Heavy daily use: Inspect frequently and clean when buildup appears.
    • Moderate use: Check monthly for grease or trapped debris.
    • Light use: Clean less often if the filter remains clear.
    • Heavily soiled loads: Inspect sooner when more food residue enters the machine.

    Additional Tips for Maintaining Optimum Dishwasher Performance

    Filter care works best as part of a broader dishwasher maintenance routine. Simple habits reduce debris and help washable components remain clear.

    • Scrape heavy food residue before loading.
    • Use manufacturer-recommended detergent.
    • Inspect spray-arm openings for visible blockage.
    • Wipe door edges and gaskets appropriately.
    • Check the filter when odors or residue return.
    • Follow model guidance for tub cleaning and descaling.

    Conclusion: Lasting Benefits of Deep Cleaning Your Dishwasher Filter

    Consistent filter care helps maintain cleaner wash performance and prevents heavy residue from accumulating unnoticed. Gentle rinsing, occasional soaking, and careful brushing make routine maintenance easier. 

    Following the appliance manual also protects delicate filter components during removal and reinstallation. A regular inspection habit helps catch buildup before it becomes harder to remove.

  • Simple Ways to Clean a Sticky Steam Iron Soleplate

    Simple Ways to Clean a Sticky Steam Iron Soleplate

    Sticky steam iron soleplates are a common annoyance in efficient homes. This issue can impact fabric care, cause snags, and shorten your appliance’s lifespan.

    Homeowners using kitchen gadgets and smart appliances often look for practical, time-saving solutions. The following tips provide clear methods to bring your iron back to optimal condition with minimal fuss.

    Understanding the Problem: Why Do Soleplates Get Sticky?

    Residue can build up from starch sprays, synthetic fibers, and fabric softeners. Over time, the underside of an iron may develop noticeable stickiness.

    Simple Ways to Clean a Sticky Steam Iron Soleplate

    Burnt-on fabric or improper water choices also contribute. Unattended, these residues become stubborn and reduce effectiveness.

    Safety Precautions Before Cleaning

    Unplug the steam iron and allow it to cool. Some prefer testing temperature with a quick touch on a folded cloth, ensuring it’s safe to handle before cleaning.

    Check the instruction manual for specific care advice. Not all irons tolerate the same treatments—reading the guide helps prevent surface damage.

    Quick Start: Basic Cleaning Supplies

    • Baking soda 
    • White distilled vinegar
    • Soft microfiber cloth
    • Non-scratch nylon scrub pad
    • Cotton swabs
    • Toothpick or wooden skewer

    Most residue is removable with household staples. Avoid metal tools, which could scratch the nonstick soleplate coating.

    Methods for Cleaning a Sticky Steam Iron Soleplate

    Using Baking Soda Paste

    Baking soda is a gentle abrasive for cleaning irons. Many find this method effective for sticky types of buildup.

    1. Mix a tablespoon of baking soda with just enough water to form a thick paste.
    2. Apply the paste to sticky areas with a microfiber cloth.
    3. Leave for 3 to 5 minutes, then gently rub the paste around with the cloth.
    4. Wipe residue away with a damp cloth, repeating as needed.

    White Vinegar for Stubborn Residue

    Some homeowners swear by white distilled vinegar when facing heavy, burnt-on gunk. This solution helps dissolve the toughest grime without harsh chemicals.

    Simple Ways to Clean a Sticky Steam Iron Soleplate
    1. Dampen a cloth with pure white vinegar and lay it flat on the counter.
    2. Place the unplugged soleplate directly on the cloth for 5 minutes. (Always keep the water tank empty when cleaning with vinegar.)
    3. Use the same vinegar cloth to wipe away softened debris.
    4. Finish with a water-dampened cloth to remove any lingering vinegar smell.

    Commercial Iron Cleaning Pads

    Some households prefer specialized soleplate cleaning pads, with products from Faultless typically available at appliance centers or online retailers.

    1. Rub the pad gently along a warm (not hot) soleplate.
    2. Inspect for residue on both the iron and pad to gauge cleaning progress.

    While pricier than household items, these pads are designed for iron care and do not scratch nonstick surfaces.

    Salt Method for Minor Stickiness

    Table salt is sometimes used, as it can pick up sticky material without leaving residue on the plate.

    1. Spread a layer of salt on a clean cotton towel.
    2. Once the iron is warm (but unplugged), gently move it back and forth over the salt.
    3. Brush away salt crystals and wipe the plate clean with a soft cloth.

    Deep Cleaning: Removing Burnt Fabric Residue

    Toothpicks and Cotton Swabs for Steam Holes

    Residue inside steam holes is easy to overlook. It can, however, compromise steam flow and fabric safety.

    • After cleaning the soleplate surface, use a toothpick to gently dislodge gunk from each steam vent.
    • Follow up with a cotton swab dipped in distilled water to wipe inside each hole.

    For stubborn blockages, repeating this process may be needed.

    Nonstick Coating Considerations

    Some steam irons use a nonstick coating for smoother gliding. Older models might have plain stainless steel, so check yours before selecting a cleaning product.

    Avoid abrasive powders or scouring pads if the iron uses a coated plate. Stubborn residue may come off with repeated gentle treatments instead.

    Tips for Preventing Future Stickiness

    Simple maintenance habits can help keep an iron soleplate smooth and residue-free. Regular cleaning and careful use can also reduce buildup and prevent future sticking problems.

    • Use distilled water in the steam chamber when recommended to help reduce mineral buildup.
    • Wipe the soleplate with a soft damp cloth after each use to remove starch, fabric softener, or residue.
    • Avoid ironing directly over zippers, decals, printed designs, or glue transfers.
    • Check garment care labels and use the correct temperature setting for each fabric.
    • Start with a lower heat setting when ironing delicate or synthetic materials.
    • Avoid using excessive spray starch, which can leave sticky deposits on the soleplate.
    • Clean the steam vents periodically to prevent residue from collecting around the openings.
    • Let the iron cool completely before wiping away any remaining buildup.
    • Store the iron upright when not in use to protect the soleplate from contact with other surfaces.

    Periodic light cleaning keeps irons running smoothly for years.

    Maintenance Routines for Appliance Longevity

    Many efficiency enthusiasts keep a monthly iron care checklist on their fridge or smartphone:

    • Inspect for discoloration or residue monthly.
    • Clean steam holes quarterly with a toothpick.
    • Check and empty the water chamber after each use.
    • Test the cord for wear before each session to ensure safety.

    Establishing a consistent habit can prevent build-up and minimize future cleaning sessions.

    When to Seek Professional Help or Replacement?

    If sticky residue remains after repeated cleaning, the iron may have a damaged soleplate or internal issue. In some cases, professional inspection is safer than continued DIY cleaning.

    Contact a Professional

    Reach out to the manufacturer or a qualified appliance technician if the soleplate appears damaged. A professional can determine whether the iron can be repaired safely. This is especially useful when residue returns quickly after cleaning.

    Consider Replacing the Iron

    Replacement may be more practical for very old or heavily damaged irons. Deep scratches, peeling coatings, or recurring performance problems can affect safe use. Compare repair costs with the price of a new iron before deciding.

    Conclusion

    Caring for a sticky steam iron soleplate is mostly about consistency and the right tools. Adopting smart, safe cleaning routines restores performance and protects clothing from damage.

    By using simple materials and a regular maintenance schedule, most homeowners can keep their appliance running efficiently for years. In the end, a clean iron means less stress, better results, and more value from every gadget in your home.

  • How to Remove Mineral Buildup From an Electric Tea Kettle

    How to Remove Mineral Buildup From an Electric Tea Kettle

    Hard water minerals often build up inside electric tea kettles. This can affect both performance and taste. For those looking to maintain efficiency at home, regular descaling is a critical step.

    This guide is especially useful for anyone who uses their kettle daily. Learning how to remove mineral buildup easily helps safeguard your appliance and your beverages.

    Why Mineral Buildup Occurs in Electric Tea Kettles?

    Minerals like calcium and magnesium are naturally present in tap water. When water boils, these minerals separate and settle as a white or chalky residue, commonly called lime scale.

    How to Remove Mineral Buildup From an Electric Tea Kettle

    Frequent use of a kettle in hard water regions results in more rapid scaling. Over time, this can cause heating elements to become less efficient or degrade taste quality.

    Risks of Ignoring Scale in Kettles

    Neglecting mineral buildup may shorten the lifespan of the heating element. The appliance can start to take longer to heat up, using extra energy and driving up utility costs.

    Residue buildup might also flake off into your drinks. This leaves unsightly particles and can affect taste, especially in tea or coffee that relies on clean, neutral water.

    Choosing Safe and Effective Descaling Solutions

    The right descaling solution can help remove mineral buildup without damaging the kettle’s interior. Gentle household options are often effective for routine maintenance and improving heating performance.

    Vinegar Solution

    The most common home remedy is white vinegar. It dissolves scale efficiently without harsh chemicals, so it’s practical for routine cleaning.

    • Fill the kettle halfway with equal parts white vinegar and water.
    • Allow the mixture to soak for 30 to 45 minutes. For thicker buildup, overnight soaking may help.
    • Boil the solution, then unplug and let it cool completely.
    • Pour out the contents and rinse several times with fresh water.

    Lemon Juice Method

    Lemon juice contains citric acid, which can also remove scale. This method is natural and leaves a fresh scent afterward.

    How to Remove Mineral Buildup From an Electric Tea Kettle
    • Mix fresh lemon juice with water in a one-to-one ratio.
    • Pour into the kettle and let it sit for at least an hour.
    • Boil the mixture, then leave it to cool down before pouring it out.
    • Rinse thoroughly until all citrus odor is gone.

    Commercial Descaling Products

    Some prefer specialized kettle descalers, such as durgol, available in most kitchen supply stores. These are typically formulated for fast action on tough scaling.

    • Follow product instructions exactly to avoid residue or damage.
    • Always perform multiple rinses after using a chemical product.

    Step-by-Step: Removing Mineral Buildup from Your Kettle

    Regular descaling helps remove mineral deposits that can affect kettle performance and cleanliness. Following a careful process also helps protect internal surfaces while reducing leftover residue.

    1. Unplug the kettle and confirm it is cool before starting.
    2. Empty out any water and remove the filter (if detachable). Clean filters separately to prevent buildup blockage.
    3. Choose your descaling solution: vinegar, lemon juice, or a commercial product.
    4. Fill the kettle as per instructions for your chosen solution.
    5. Let the solution soak for the recommended time to break down scale deposits.
    6. If using vinegar or lemon, bring the solution to a boil. Allow it to cool with the lid open.
    7. Empty the kettle entirely. Rinse with fresh water two or three times, swirling to remove any leftover acidity.
    8. Wipe interior surfaces with a soft, non-abrasive cloth or sponge. Avoid scrubbing heating coils directly.
    9. Replace the filter before refilling for use.

    Extra Tips for Cleaning Electric Kettle Parts

    Regular cleaning helps keep an electric kettle fresh, functional, and free from residue. Different parts may require slightly different cleaning methods.

    Cleaning the Exterior

    Wipe the exterior with a soft cloth dampened with mild dish soap and water. Avoid abrasive cleaners that could scratch or dull the surface. Keep moisture away from electrical connections, joints, and the kettle base.

    Maintaining Lid and Spout

    Residue can collect around the lid, spout, and other narrow areas. Use a small bottle brush or cotton swab to reach tight spaces carefully. Wipe away loosened buildup and allow the parts to dry completely.

    Dealing with Persistent Odors

    Lingering vinegar or lemon odors can usually be reduced by boiling fresh water. Fill the kettle with plain water, boil it, and discard the water afterward. Repeat the process if necessary until the odor disappears.

    How Often to Descale for Best Performance?

    Most efficiency experts recommend monthly descaling for those in hard water regions. If the kettle is used less frequently or with filtered water, every 2 or 3 months might be enough.

    Visible scale, slow boiling, or metallic tastes can be signs of buildup returning sooner than scheduled. Being observant saves effort later.

    How Mineral Buildup Impacts Kettle Lifespan?

    Consistent descaling can add years to a kettle’s useful life. A well-maintained heating coil will warm water faster and stay energy efficient.

    Appliance warranties sometimes require evidence of good cleaning practices. It’s worth checking your manual to see if descaling is advised for warranty coverage.

    Preventive Measures and Daily Kettle Care

    Simple daily habits can help reduce mineral buildup and keep an electric kettle cleaner. Regular care also makes deeper cleaning less frequent.

    Empty and Dry the Kettle

    Pour out any remaining water after each use. Leaving the lid open can help the interior dry more completely. This reduces standing moisture and helps limit buildup.

    Use Lower-Mineral Water

    Filtered or distilled water can help reduce mineral deposits inside the kettle. This is especially useful in areas with hard water. Using cleaner water may also make descaling easier over time.

    When to Consider Replacing Your Kettle?

    If scale returns very quickly despite regular cleaning, the heating element may be deteriorating. Flaking or pitting inside the kettle body is another sign that replacement could be practical.

    For kettles with persistent residue or electrical faults, purchasing a new model often saves time and avoids hassle.

    Conclusion

    Routine removal of mineral buildup from an electric tea kettle promotes energy savings, improved taste, and appliance longevity. Selecting gentle, effective solutions like white vinegar or lemon juice saves time while keeping your appliance in lasting shape. 

    By staying attentive and proactive in maintenance, many homeowners discover that a kettle can perform consistently well for years with minimal effort.

  • How to Clean Stainless Steel Appliances Without Leaving Streaks

    How to Clean Stainless Steel Appliances Without Leaving Streaks

    Stainless steel appliances create a clean, modern appearance, but fingerprints and streaks can dull the finish. This guide explains safe cleaning methods, useful supplies, and ways to maintain shine. 

    It also covers problem areas, natural alternatives, common mistakes, and routines. These steps can help keep stainless steel bright and polished without harsh scrubbing.

    How to Clean Stainless Steel Appliances Without Leaving Streaks

    Understanding Stainless Steel Surfaces

    Stainless steel appliances may have brushed or polished finishes that respond differently to cleaning. Identifying the surface grain before wiping helps reduce visible marks.

    Brushed steel shows cross-grain streaks, while polished surfaces reveal fingerprints easily. Cleaning in the grain direction creates a more uniform appearance. Check the manual for finish-specific requirements before using a new product.

    Why Streaks Appear on Stainless Steel?

    Streaks commonly result from excess cleaning liquid, soap residue, mineral deposits, or wiping against the grain. Fingerprints and cooking oils can also leave uneven patches after incomplete cleaning.

    Too much cleaner may dry into residue. Tap water can leave mineral spots as droplets evaporate. A clean dry cloth helps remove remaining moisture.

    Essential Supplies for Streak-Free Results

    Simple household supplies are usually enough for routine stainless cleaning. Choose soft materials and products that match manufacturer recommendations.

    How to Clean Stainless Steel Appliances Without Leaving Streaks
    • Microfiber cloths: Soft, lint-free options for wiping and polishing
    • Mild dish soap
    • White vinegar, when approved
    • Distilled water
    • Spray bottle
    • Specialized stainless steel cleaner
    • Baking soda for compatible stubborn spots

    A product such as Weiman Stainless Steel Cleaner & Polish is designed for stainless steel surfaces. Confirm finish compatibility before treating the entire appliance.

    Preparation Before Cleaning

    Preparation helps prevent surface scratches and limits moisture near sensitive areas. Check manufacturer guidance, then remove loose residue before applying cleaning solution.

    Lift crumbs with a damp microfiber cloth instead of dragging them across steel. Follow the finish lines while wiping. Keep liquids away from electrical controls.

    Step-by-Step Cleaning Process

    A consistent sequence makes streak-free cleaning easier. Begin gently and use stronger treatments only when visible residue remains.

    Daily Wipe-Down for Routine Care

    Daily cleaning works well for light fingerprints and fresh splashes. A lightly damp microfiber cloth followed by immediate drying is usually enough.

    1. Moisten a microfiber cloth with distilled water and wring it well.
    2. Wipe gently in the direction of the stainless steel grain.
    3. Buff immediately with a separate dry microfiber cloth.

    Cleaning Heavier Smudges and Prints

    Heavier fingerprints may require mild soapy water instead of plain water. Work in sections so cleaner does not dry and leave new streaks.

    1. Mix a few drops of mild dish soap with warm distilled water.
    2. Dampen a microfiber cloth and remove excess liquid.
    3. Wipe along the grain around doors and handles.
    4. Follow with a cloth dampened with plain distilled water.
    5. Buff dry to remove soap residue.

    Removing Stubborn Spots and Streaks

    Persistent marks may need a targeted cleaning method after routine wiping fails. Test vinegar or baking soda first and confirm finish compatibility.

    1. Prepare a 1:1 mixture of white vinegar and distilled water if approved.
    2. Apply a small amount to the cloth instead of displays or seams.
    3. Wipe gently in the direction of the surface grain.
    4. Follow with a water-dampened cloth if needed.
    5. Buff dry with a fresh microfiber cloth.

    Baking soda may loosen stuck-on residue on compatible finishes. Use gentle pressure because abrasion can alter the surface appearance. Stop if scratching appears.

    Expert Tips for a Streak-Free Finish

    Small technique changes can improve polishing results across appliance panels. Controlled moisture and a clean final cloth help prevent residue transfer.

    • Keep one microfiber cloth damp and one dry for polishing.
    • Use distilled water when tap water leaves mineral spots.
    • Apply only a small amount of cleaning solution.
    • Do not let wet cleaner dry on steel.
    • Apply commercial cleaner to the cloth when directions permit.

    Natural Cleaning Alternatives

    Some households prefer simple cleaning solutions instead of specialty products. Use natural options only when the manufacturer permits them.

    Diluted vinegar may remove light residue from compatible surfaces. A tiny amount of oil can provide light polishing, but too much may leave a film. Remove excess if the surface becomes greasy or streaky.

    Areas Prone to Streaks and How to Address Them

    High-touch areas need more frequent attention than broad panels. Handles, seams, and dispensers collect different residues, so cleaning should match the specific problem.

    Control Panels and Handles

    Handles and controls collect finger oils and smudges during use. Wipe them with damp microfiber and an approved cleaner without saturating openings. Finish dry to prevent visible moisture marks.

    Seams and Edges

    Narrow seams collect crumbs and grime that broad wiping may miss. A cotton swab or folded microfiber corner can reach these spaces. Avoid saturating edges because excess moisture may enter gaps.

    Water Dispensers and Drip Trays

    Water dispensers may develop mineral deposits from repeated splashing. Wipe fresh droplets before spots form. For stubborn buildup, use an approved descaling method.

    Avoiding Common Cleaning Pitfalls

    Incorrect tools can leave scratches, residue, or lint on stainless steel. Gentle materials and controlled moisture help protect the decorative finish.

    • Avoid abrasive scrub pads and steel wool.
    • Do not use dirty cloths containing grit.
    • Limit excess water near seams and controls.
    • Avoid unapproved bleach, ammonia, or oven cleaners.
    • Never scrub aggressively across the surface grain.

    Maintaining the Finish Long-Term

    Routine spot cleaning keeps fingerprints and grease manageable. Keeping a clean microfiber cloth nearby makes quick touch-ups easier.

    Optional polish can be used when permitted. Buff thoroughly so product residue does not create streaks. Regular checks can reveal surface damage early.

    Recommended Cleaning Routine Schedule

    A simple schedule keeps stainless steel care manageable. Adjust the timing according to visible buildup and appliance use.

    • Daily: Wipe fingerprints or splashes with damp microfiber.
    • Weekly: Use mild dish soap when grease buildup appears.
    • Monthly: Apply an approved stainless steel polish if desired.

    Safety Considerations

    Protecting electrical components also matters when maintaining the stainless steel finish. Avoid spraying liquids directly onto controls, vents, door edges, or sensitive openings.

    Do not mix chemicals or use unapproved bleach and ammonia. Follow product label directions and ventilate when needed. Use the manual as the primary cleaning guide.

    Conclusion: Achieving a Consistently Streak-Free Look

    Keeping stainless steel appliances streak-free depends on gentle materials, limited moisture, and consistent wiping. Following the grain and finishing with a dry microfiber cloth helps prevent residue and water marks. 

    Regular spot cleaning also reduces the need for aggressive treatments that may damage the finish. With a predictable care routine, stainless steel can remain polished with less effort.

  • How to Clean an Oil-Filled Radiator Heater Safely

    How to Clean an Oil-Filled Radiator Heater Safely

    Oil-filled radiator heaters need regular cleaning to maintain safe and efficient performance. Dust, debris, and surface buildup can reduce heat circulation and affect everyday use. 

    This guide explains how to clean the fins, controls, power cord, and exterior surfaces using safe household methods. It also covers maintenance frequency, common mistakes, warning signs, and basic troubleshooting after cleaning.

    How to Clean an Oil-Filled Radiator Heater Safely

    Understanding Oil-Filled Radiator Heaters

    The design of an oil-filled radiator heater centers on simple mechanics. Inside, sealed mineral oil transfers heat from an internal heating element to the outer metal fins.

    The sealed oil never needs replacement. What you can control is surface cleanliness, ensuring no dust clogs air flow where heat escapes.

    Safety Precautions Before Cleaning

    The first rule is safety. Allow the radiator to cool fully before handling or cleaning—surface temperatures can remain hot for some time.

    • Always unplug the unit before starting any cleaning process.
    • Test the exterior gently before moving or touching, to avoid burns.
    • Keep water and cleaning products away from electrical switches, controls, and the power cord.
    • Avoid opening panels or accessing the interior. These devices are not designed for DIY internal repairs.

    Protecting the electronics and the heater’s finish should remain a top concern at every step.

    Essential Materials Needed

    • Microfiber cloths 
    • Soft bristle brush (such as a paintbrush or toothbrush)
    • Mild dish soap or pH-neutral cleaner
    • Vacuum cleaner with dust brush attachment
    • Distilled water for spot rinsing
    • Optional: Compressed air canister (for deep dust removal)

    Choosing lint-free and non-abrasive items minimizes risks of scratching surfaces or leaving behind fibers that could burn.

    Step-by-Step Cleaning Process

    A careful cleaning routine can help remove dust buildup and support more efficient heat circulation. Starting with dry cleaning methods also helps protect the radiator’s surface and electrical components.

    Surface Dust Removal

    Many homeowners prefer to begin with a thorough dusting. Built-up dust acts as insulation, robbing heat output and contributing to allergy triggers.

    1. Unplug the radiator and ensure all surfaces are cool.
    2. Use a vacuum with a soft brush to remove loose dust from fins and around the base.
    3. A microfiber cloth may help catch any fine residue missed by vacuuming.

    Deep Cleaning the Metal Fins

    For older heaters or models such as De’Longhi, deeper attention to the fins is helpful. The narrow spaces between fins tend to trap grime.

    How to Clean an Oil-Filled Radiator Heater Safely
    1. Insert a soft bristle brush between each fin, gently brushing away debris.
    2. Follow up with the vacuum to capture dislodged dust.
    3. A barely damp microfiber cloth, lightly moistened with diluted dish soap, can be passed along exterior fin surfaces. Avoid letting liquid drip into seams.

    Addressing Stubborn Spots and Stains

    On rare occasions, drips or splatter might leave marks on the exterior. Many recommend mild dish soap solution for tackling these areas.

    1. Apply a small amount of diluted soap onto a microfiber cloth.
    2. Wipe the affected spot in gentle, circular motions.
    3. Rinse with a second cloth dampened with distilled water to remove residues.
    4. Use a dry cloth to prevent moisture streaks.

    Cleaning Controls and Power Cord

    Control panels, adjustment wheels, and the power cord also accumulate dust and fingerprints.

    1. Wipe switches and dials with a slightly damp cloth.
    2. For grooves or tight corners, a toothpick or dry brush can release lodged dust.
    3. Check the cord for dust and wipe with a dry or barely damp microfiber cloth.

    Maintaining Efficiency After Cleaning

    Regular upkeep helps an oil-filled radiator stay clean and perform consistently. Simple storage and placement habits can also reduce future dust, spills, and buildup.

    Keep the Radiator in a Clean Area

    Place the radiator away from kitchen counters, sinks, and other areas where spills are common. Move it temporarily during deep cleaning to avoid splashes from mopping or window washing. Keeping the exterior dry and dust-free makes future maintenance easier.

    Store It Properly Between Seasons

    Store the radiator in a clean, dry location when it is not in use. Avoid damp areas that may encourage corrosion or moisture buildup. A seasonal cleaning before storage can also help keep the unit ready for future use.

    Common Mistakes to Avoid

    Incorrect cleaning methods can damage an oil-filled radiator and create safety concerns. Using gentle, dry cleaning techniques helps protect both the appliance and its electrical components.

    Avoid Excess Water and Harsh Cleaners

    Never submerge the radiator or clean it with a soaking-wet cloth. Avoid abrasive pads, scouring powders, bleach, or other harsh cleaners. Use a soft, slightly damp cloth only where appropriate.

    Protect Electrical Components

    Always unplug the radiator before cleaning, even when removing light dust. Keep moisture away from the cord, plug, switches, and control panel. Allow all cleaned areas to dry completely before reconnecting power.

    Frequency of Cleaning

    Cleaning frequency depends on how dusty the home becomes and how often the radiator is used. Homes with pets or heavy dust may require more frequent maintenance.

    Follow a Seasonal Routine

    Give the radiator a thorough wipe-down before and after the heating season. This helps remove accumulated dust before storage or regular use. Monthly dusting may be useful in homes with pets or higher dust levels.

    Clean When Buildup Appears

    Do not rely only on a fixed cleaning schedule. Visible dust, sticky spots, or debris between the fins are signs that cleaning is needed. Light maintenance between deeper cleanings can prevent heavy buildup.

    Signs Your Radiator Needs Immediate Attention

    Certain signs indicate that the radiator should be inspected or cleaned sooner rather than later. Addressing buildup early can help maintain airflow and safe operation.

    Watch for Dust and Odors

    Visible dust or debris between the fins is a clear sign that cleaning is needed. A dusty or burnt smell during operation may come from particles heating on the exterior surfaces. Turn the unit off and allow it to cool before inspecting it.

    Check Cords and Controls

    Hair, dust, or debris around the cord and controls should be removed carefully. Inspect the cord and plug for visible wear or damage while cleaning. Stop using the radiator and seek professional advice if electrical components appear damaged.

    Troubleshooting After Cleaning

    Occasional problems may appear if moisture remains on the radiator after cleaning. Basic checks can help determine whether the issue is temporary or requires further attention.

    Allow the Radiator to Dry Fully

    Do not reconnect the radiator until every cleaned surface is completely dry. If moisture reaches controls, vents, or electrical areas, leave the unit unplugged and follow the manufacturer’s drying guidance. Avoid testing the appliance while any moisture remains.

    Seek Help for Persistent Problems

    Check that the plug, outlet, and controls are dry and properly positioned before use. If the radiator still does not operate normally, consult the appliance manual for troubleshooting instructions. Contact the manufacturer or a qualified technician if the problem continues.

    Conclusion

    Maintaining a clean oil-filled radiator heater maximizes efficiency, extends appliance life, and supports a healthier home. Regular dust removal, careful surface cleaning, and adherence to safety practices are central to effective upkeep. 

    Prioritizing these habits ensures the heater performs at its best for years while minimizing potential hazards or costly damage. For the most reliable results, make gentle, routine care a part of your regular home maintenance plan.

  • How to Defrost a Compact Freezer Quickly and Safely

    How to Defrost a Compact Freezer Quickly and Safely

    Compact freezers are useful kitchen appliances for storing frozen foods in small homes, dorms, and shared apartments. Over time, thick frost can reduce storage space and interfere with cold-air circulation

    This guide explains how to prepare, defrost, clean, restart, and maintain a compact freezer safely. It also covers time-saving methods, prevention tips, and situations that may require professional service.

    Why Defrosting a Compact Freezer Matters?

    Frost buildup can reduce usable storage space and make drawers, shelves, or doors harder to operate. Regular defrosting also helps maintain efficient airflow around stored food and cooling surfaces.

    How to Defrost a Compact Freezer Quickly and Safely

    A thick layer of ice can crowd packages and make the interior harder to organize. It may also force users to rearrange food around frozen sections or jammed compartments. Keeping frost under control makes routine freezer use simpler and more predictable.

    What to Know Before Defrosting?

    Safe preparation starts by unplugging the freezer and protecting nearby flooring from meltwater and spills. Gathering supplies beforehand keeps the defrosting process organized once the ice begins to soften.

    • Absorbent towels for collecting meltwater
    • Plastic or silicone spatula
    • Bowls or shallow trays
    • Cooler bags or insulated bins
    • Mild dish soap
    • Soft sponge
    • Microfiber cloth
    • Ice packs for temporarily storing frozen food

    Move perishable food into an insulated cooler before leaving the freezer open. If you own a Midea freezer or another brand, check the specific product manual before beginning appliance maintenance.

    Step-by-Step: Quick and Safe Defrosting

    A careful sequence limits water mess while protecting the liner, shelves, and electrical components. Allow ice to soften before attempting removal so the interior is not damaged by forceful scraping.

    1. Remove Food and Shelves

    Transfer frozen food into a cooler with ice packs before the freezer temperature begins rising. 

    How to Defrost a Compact Freezer Quickly and Safely

    Remove detachable shelves, baskets, and drawers only when they release easily. Set these pieces aside for separate cleaning once the defrosting area is prepared.

    2. Position Towels and a Tray

    Place absorbent towels inside and around the freezer to collect melting ice water. A shallow tray near the door can catch overflow before it reaches the floor. Check the towels regularly and replace or wring them out when they become heavily saturated.

    3. Allow Ice to Soften

    Leaving the unplugged freezer door open allows room-temperature air to soften thick frost naturally

    For faster melting, place a bowl of hot but not boiling water inside on a heat-resistant surface. Keep water containers stable and away from electrical areas.

    4. Gently Remove Chunks

    Once ice loosens naturally, remove pieces with a plastic or silicone tool rather than metal utensils. Work slowly and never pry against the freezer liner or cooling surfaces. Patient removal reduces the chance of punctures or cracks.

    5. Clean and Dry Surfaces

    After the ice is gone, wash accessible interior surfaces with mild soapy water and a soft sponge. Wipe away cleaning residue with a clean damp cloth. Dry the walls, floor, gasket, shelves, and drawers thoroughly to limit remaining moisture.

    6. Restarting and Restocking

    Reconnect the freezer only after the interior and removable parts are fully dry. Allow the appliance to return to its recommended operating temperature before adding food. Replace shelves and bins securely, then restock without blocking airflow areas.

    Top Ways to Speed Up Defrosting With Caution

    Some gentle methods can shorten the wait without exposing the appliance to unnecessary heat or damage. Avoid shortcuts involving direct high heat, sharp tools, or boiling water.

    • Place a bowl or pan of hot water on a heat-resistant surface inside the unplugged freezer.
    • Replace the water when it cools if more melting is needed.
    • Use a room fan outside the freezer to circulate ambient air when practical.
    • Avoid knives, screwdrivers, metal scrapers, or other sharp tools.
    • Never pour boiling water directly onto ice, liners, shelves, or seals.

    Hairdryers and other electrical heating devices introduce additional heat and moisture risks around melting water. Natural airflow and hot-water bowls provide a more controlled approach for most households.

    How Often Should You Defrost?

    The right interval depends on frost accumulation, humidity, door opening, and the freezer design. Manual-defrost units should be cleaned when ice begins reducing usable space or interfering with normal operation.

    A calendar reminder can help owners check the interior every few months. Auto-defrost models require different care, so follow the manufacturer schedule instead of applying a manual-defrost routine unnecessarily.

    Cleaning and Organizing Tips After Defrosting

    A fully defrosted freezer creates a convenient opportunity to clean accessories and improve food organization. Work with dry components before returning food to the appliance.

    Clean Interior Accessories

    Shelves, baskets, and ice trays can collect food residue and spills over time. Wash removable pieces with mild dish soap when their care instructions allow it. Rinse and dry each item completely before returning it to the freezer.

    Disinfect High-Touch Areas

    The door handle, gasket, and frequently touched surfaces may need extra cleaning attention. Use only cleaners that are compatible with the appliance materials. Wipe treated surfaces clean and dry so chemical residue does not remain.

    Organize and Inventory

    Sorting food into categories makes the available freezer space easier to use after defrosting. Group proteins, vegetables, prepared meals, and frequently used items in predictable areas. Adding dates to packages can support better food rotation.

    Extra Prevention Tips

    A few everyday habits can slow future frost buildup and make the next maintenance session easier. Focus on limiting warm, humid air and keeping the door seal effective.

    • Keep the freezer door closed whenever possible.
    • Inspect the gasket regularly for damage or poor contact.
    • Let hot foods cool appropriately before freezing.
    • Avoid overcrowding shelves or blocking airflow.
    • Wipe moisture or spills before they freeze onto surfaces.
    • Keep packages arranged so the door closes completely.

    When to Seek Professional Help?

    Persistent frost, leaks, unusual noises, or a door that no longer seals may indicate an appliance problem rather than ordinary maintenance. Electrical repairs, refrigerant work, and internal component replacement should be left to a qualified technician.

    If the freezer stops cooling correctly after defrosting, disconnect it and follow the manufacturer’s service guidance. Warranty coverage may apply depending on the model, purchase date, and warranty terms.

    Conclusion

    Regularly defrosting a compact freezer restores usable storage space and keeps the interior easier to clean and organize. Unplugging the unit, protecting the floor, softening ice naturally, and using non-metal tools reduce avoidable damage. 

    Thorough drying and careful restocking also help limit rapid frost return. With a consistent maintenance routine, freezer defrosting becomes a manageable household task rather than a major project.

  • The Best Way to Clean a Standalone Ice Cream Maker Bowl

    The Best Way to Clean a Standalone Ice Cream Maker Bowl

    Ice cream maker bowls need gentle routine cleaning after every batch. This guide explains how to wash, dry, deodorize, and store the bowl safely. 

    It also covers safe cleaning agents, common mistakes, maintenance, and wear checks. These steps help protect freezing performance and keep desserts fresh.

    Why Cleaning the Bowl Properly Matters?

    Regular cleaning removes sugar, dairy residue, and lingering flavors that can affect later batches. Careful maintenance also protects the bowl surface and supports consistent freezing results.

    The Best Way to Clean a Standalone Ice Cream Maker Bowl

    Understanding the Material and Design

    Many standalone freezer bowls use double-wall construction with freezing liquid sealed between the walls. Materials vary by model, so cleaning should follow the manufacturer’s instructions.

    Typical Parts That May Need Separate Cleaning

    Several removable components collect ice cream residue during churning. Cleaning compatible parts separately helps prevent odors and sticky buildup.

    • Bowl with sealed freezing liquid
    • Dasher or paddle
    • Lid
    • Drive shaft or locking mechanism

    A Cuisinart freezer bowl is a model-specific replacement bowl, so cleaning should match the exact machine.

    Step-by-Step: The Best Way to Clean a Standalone Ice Cream Maker Bowl

    A simple sequence removes residue while protecting the freezing bowl structure. Work gently throughout each cleaning stage.

    1. Let the Bowl Return to Room Temperature

    Let the bowl warm naturally after use before routine hand cleaning. Washing a deeply frozen bowl with warmer water can create unnecessary temperature stress. Wait until frozen residue softens enough for gentle removal.

    2. Rinse Off Excess Ice Cream or Mix

    Rinse loose residue with cool or lukewarm water when permitted. Rotate the bowl so water reaches the bottom, sides, and rim. Avoid very hot water because it may affect coatings or sealed construction.

    The Best Way to Clean a Standalone Ice Cream Maker Bowl

    3. Clean Gently With a Soft Cloth or Non-Abrasive Sponge

    Use mild dish soap with a soft sponge or cloth to remove sugar and cream residue. Focus on seams, corners, and the upper rim where buildup collects. Light pressure protects the interior bowl surface from scratches.

    4. Avoid Soaking the Bowl

    Do not leave a sealed freezer bowl submerged for long periods unless the manufacturer permits soaking. Extended immersion may be unsuitable for some designs or seams. Hand washing gives better control over water exposure.

    5. Dry Thoroughly Before Storage

    Dry the bowl completely with a clean lint-free towel after rinsing. Check the rim, underside, and recessed areas for remaining droplets. Complete drying helps prevent unwanted freezer ice later.

    Pro Tips for Best Results

    Extra care can address persistent residue or odors that normal washing misses. Test optional household cleaners against the manufacturer’s guidance.

    Addressing Persistent Odors

    A mild baking soda mixture may help with lingering food odors on compatible surfaces. Apply a small amount with a soft cloth without abrasive rubbing. Rinse thoroughly so no powdery residue remains.

    Dealing With Sticky Build-Up

    Sticky sugar or cream films usually respond to mild dish soap and patient wiping. If diluted vinegar is permitted, use a small amount on a soft cloth. Rinse promptly to prevent vinegar scent or residue.

    Regular Maintenance Suggestions

    A regular routine keeps removable components cleaner and makes cleanup faster. Inspect the bowl and accessories while washing.

    • Wash removable parts after each use.
    • Deep-clean compatible accessories periodically.
    • Wipe sticky drips from the exterior.
    • Inspect seams and rims.
    • Dry every part before storage.

    Common Mistakes to Avoid

    Incorrect cleaning can damage coatings, seals, or surfaces and shorten bowl life. Gentle hand cleaning is the safest default unless the manual permits another method.

    • Using hot water on a frozen bowl
    • Dishwashing without approval
    • Scrubbing with steel wool
    • Using sharp tools on residue
    • Storing the bowl wet
    • Forcing frozen residue away

    Safe Cleaning Agents to Use

    Choose simple products that remove residue without strong chemical traces. Use only cleaners compatible with the bowl material.

    • Mild dish soap
    • Baking soda for compatible odor treatment
    • Diluted white vinegar when permitted
    • Cool or lukewarm rinse water

    Avoid bleach, strong solvents, and abrasive cleaning powders. Harsh products may damage finishes or leave unwanted residue.

    How to Store the Bowl After Cleaning?

    Storage should keep the bowl dry, clean, and protected from dust or impact. Follow the manufacturer’s instructions for long-term placement.

    • Dry completely before storage.
    • Store upright when practical.
    • Keep heavy objects away.
    • Use a clean towel for dust protection.
    • Never seal a damp bowl in plastic.

    Maintaining Bowl Performance Long-Term

    Good handling protects freezing capability and bowl condition over repeated use. Follow recommended freezing and storage practices consistently.

    Protecting Freezing Capability

    Freeze the bowl only after it is completely clean and dry. Follow the recommended freezing time and temperature before making another batch. Avoid repeated extreme temperature changes because gradual handling is gentler on materials.

    Checking for Wear and Tear

    Inspect the bowl for cracks, dents, or leaks along walls and seams. Stop using it if freezing liquid leaks or structural damage appears. A damaged freezer bowl should be replaced rather than repaired at home.

    Recording Cleaning Routines

    A maintenance note can help frequent users remember deep-cleaning and inspection dates. Recording occasional deeper cleaning keeps maintenance easy to track. A simple routine keeps care tasks consistent.

    FAQs: Practical Answers for Daily Cleaning

    These questions cover everyday bowl care after making frozen desserts. Use the product manual when its directions differ from general guidance.

    Can I Use the Dishwasher for My Ice Cream Maker Bowl?

    Dishwasher compatibility depends on the specific freezer bowl model. Some accessories may tolerate machine washing while the bowl requires hand washing. Check the manual before exposing it to high heat or detergent cycles.

    What If I Forget to Clean the Bowl Immediately?

    Dried residue can usually be softened with cool or lukewarm water and mild soap. Let it loosen before wiping instead of scraping. Avoid long soaking unless the manufacturer specifically approves it.

    Should I Clean the Bowl Before Every Use?

    A clean, dry bowl usually needs only a quick visual inspection before use. Wipe away dust with an appropriate clean cloth if necessary. Ensure the bowl is fully dry before freezing again.

    Conclusion: Efficient Cleaning for Performance and Durability

    Proper cleaning helps preserve ice cream quality and dependable bowl performance. Gentle washing, thorough rinsing, and complete drying reduce residue and odors. 

    Regular inspections help identify wear or damage before another batch. With simple consistent care, the bowl stays ready for homemade desserts.

  • How to Clean an Electric Meat Grinder After Use

    How to Clean an Electric Meat Grinder After Use

    Cleaning an electric meat grinder after every session supports food hygiene and performance in the kitchen. Meat, fat, and protein can remain inside small parts if the grinder is stored without proper cleaning. 

    This guide explains how to disassemble, wash, dry, reassemble, and maintain the appliance safely. It also covers cleaning tools, common mistakes, and simple routines that can protect the grinder over time.

    Why Prompt Cleaning Matters for Meat Grinders?

    Fresh meat residue can become sticky and difficult to remove from blades, plates, and narrow channels. Cleaning soon after use also limits odors and keeps future batches fresh without old residue affecting the next grinding session.

    How to Clean an Electric Meat Grinder After Use

    Main Parts of an Electric Meat Grinder to Clean

    Knowing the main components helps ensure every food-contact area receives attention after grinding. Check each removable part because small crevices can hold fat and meat even when the grinder looks clean.

    • Feed tube: The channel where meat enters the grinder.
    • Auger: The spiral part that pushes meat toward the blade.
    • Cutting blade or knife: Slices meat before it reaches the plate.
    • Grinding plate: The perforated disc that determines grind texture.
    • Food pusher: Guides meat through the feed tube.
    • Hopper: The tray that holds prepared meat.
    • Housing: The motor body and exterior surfaces.

    For example, LEM offers an official electric meat grinder product page that can help owners identify model-specific components before cleaning. Always use the manual for the exact grinder model when removal or washing instructions differ.

    Tools and Materials for Safe Cleaning

    A few gentle tools make grinder cleanup easier without scratching metal or damaging finishes. Gather supplies before disassembly so washed parts can move directly to a clean drying area.

    How to Clean an Electric Meat Grinder After Use
    • Soft nylon brush: Reaches plate holes and auger grooves.
    • Mild dish soap: Helps loosen grease and protein residue.
    • Non-abrasive sponge: Useful for washable surfaces.
    • Toothpick or wooden skewer: Helps clear small plate openings.
    • Lint-free towel: Dries parts without excess fibers.
    • Food-grade mineral oil: Optional for compatible metal parts.
    • Warm water: Useful for approved hand washing.

    Essential Safety and Preparation Steps

    Switch the grinder off and disconnect electrical power before touching blades or removable parts. Prepare a clean towel and drying rack so sharp pieces can be handled with controlled movements instead of mixing with other dishes.

    Keep the motor base away from standing water. Handle the blade by safer outer or center surfaces rather than touching the sharp cutting edges directly.

    Step-by-Step Process: How to Clean an Electric Meat Grinder After Use

    A consistent sequence makes post-use cleaning faster and reduces the chance of missing residue. Keep components arranged in order so reassembly stays simple after drying.

    Disassembly of Parts

    Remove components slowly so blades and plates do not fall into the sink. Keep small pieces together on a clean towel for safe handling and easier reassembly.

    1. Remove the food pusher and hopper tray.
    2. Detach the grinder head or feed tube as directed.
    3. Slide out the auger carefully.
    4. Detach the blade and grinding plate without touching the edge.
    5. Place each part on a clean surface.

    Initial Food Residue Removal

    Removing loose meat before washing prevents greasy debris from spreading through the sink. If using the bread-clearing technique, do it before disassembly and only when the manufacturer permits it.

    • Remove visible scraps from the feed tube, auger, blade, and plate.
    • Wipe away loose fat when needed.
    • Discard meat scraps immediately.
    • Keep raw residue away from clean dishes.

    Main Washing Process

    Warm soapy water and gentle brushing remove fat and protein from washable parts. Focus on grooves and plate holes where small food particles often remain.

    1. Fill a clean sink or basin with warm water and mild dish soap.
    2. Wash only components identified as washable.
    3. Scrub the auger and feed tube with a soft nylon brush.
    4. Clean both sides of the blade and grinding plate carefully.
    5. Clear clogged plate holes with a toothpick or small brush.
    6. Wash the food pusher and hopper.

    Cleaning the Motor Base

    The motor section requires surface cleaning only because water can damage electrical components. Use a lightly damp cloth instead of spraying cleaner onto the grinder housing.

    • Wipe grease and fingerprints with a damp cloth and mild soap.
    • Follow with a clean damp cloth if needed.
    • Dry the housing immediately.
    • Dust vents and buttons with a dry soft brush.
    • Never immerse the motor base.

    Rinsing and Drying Parts

    Complete rinsing removes soap and residue before storage. Thorough drying matters because moisture can encourage rust or odors on susceptible components.

    • Rinse washable pieces with clean warm water.
    • Check plate holes and auger grooves.
    • Pat parts dry with a lint-free towel.
    • Air-dry components completely.
    • Do not reassemble while surfaces remain damp.

    Reassembling and Storing the Grinder

    Reassemble only after every component is completely clean and dry. Proper storage keeps the blade and plate protected while limiting moisture exposure.

    • Apply food-grade mineral oil only to compatible metal parts when recommended.
    • Reassemble without forcing or over-tightening parts.
    • Protect blades and plates from accidental contact.
    • Store the grinder in a clean, dry area.
    • Keep the power cord dry and organized.

    Routine Maintenance Tips for Efficiency and Hygiene

    Regular maintenance helps keep the grinder clean, efficient, and dependable during use. Small inspections can also reveal wear, corrosion, or loose components before they cause larger problems.

    Inspect Key Components

    Check the blade, plate, auger, and fittings for visible wear or residue. Look for rust, chips, cracks, or other signs of damage. Clean or replace affected parts according to the manufacturer’s instructions.

    Confirm Proper Reassembly

    Make sure all removable parts fit securely after cleaning. Avoid forcing or over-tightening threaded components during assembly. Correct reassembly helps support smooth and reliable operation.

    Monitor Performance During Use

    Listen for unusual grinding, rattling, or other unfamiliar sounds. Changes in performance may indicate worn parts or improper assembly. Replace damaged components only with compatible replacements.

    Common Mistakes to Avoid When Cleaning

    Incorrect cleaning methods can damage electrical parts, metal surfaces, or sharp components. Gentle cleaning, thorough drying, and careful handling help protect the grinder.

    Protect Electrical Components

    Never submerge the motor base or rinse electrical areas with water. Use a lightly damp cloth for approved exterior surfaces only. Keep plugs, controls, and openings completely dry.

    Avoid Abrasive Cleaning Methods

    Do not use steel wool, aggressive scrubbers, or unapproved harsh chemicals. Abrasive tools can scratch metal surfaces and damage protective finishes. Choose soft brushes, cloths, and manufacturer-approved cleaners instead.

    Dry and Handle Parts Carefully

    Dry all metal parts completely before reassembly or storage. Remove food residue promptly to prevent odors and buildup. Handle sharp blades carefully and avoid over-tightening components.

    Conclusion: Keeping Your Electric Meat Grinder Clean and Efficient

    A consistent cleaning routine keeps an electric meat grinder hygienic and ready for its next use. Prompt disassembly, gentle washing, careful blade handling, and complete drying reduce stubborn residue and moisture problems. 

    Regular inspection also helps identify worn parts before they affect grinding. With simple maintenance habits, cleanup becomes a predictable part of food preparation.