Blog

  • How to Maintain a Digital Kitchen Scale for Accurate Results

    How to Maintain a Digital Kitchen Scale for Accurate Results

    Maintaining a digital kitchen scale helps support dependable measurements during cooking and baking. Food residue, moisture, weak batteries, and improper storage can affect everyday use. 

    This guide explains how to clean, calibrate, store, and protect a scale safely. It also covers battery care, common issues, material-specific cleaning, and replacement signs.

    Understanding Your Digital Kitchen Scale

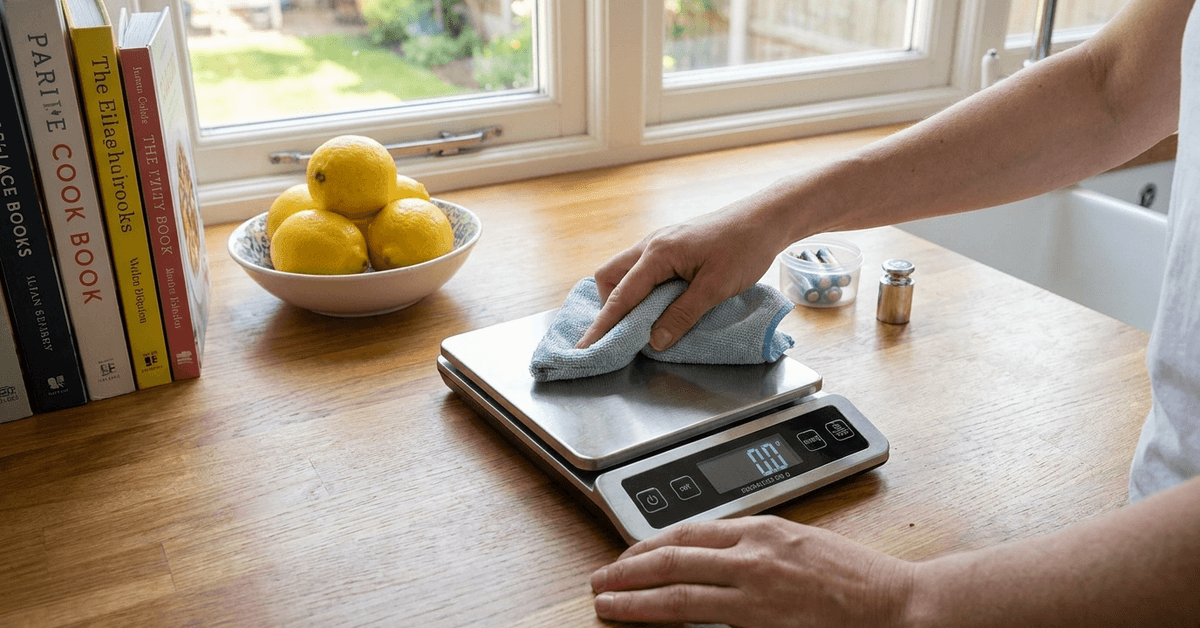
    A digital kitchen scale usually includes a weighing platform, display, control buttons, battery compartment, and internal weight sensors

    Understanding these parts makes cleaning easier while helping protect sensitive components from moisture or damage.
    How to Maintain a Digital Kitchen Scale for Accurate Results

    For example, OXO offers an 11-pound stainless steel food scale with a pull-out digital display and 1-gram increments. Checking the specific product instructions remains important because maintenance requirements vary by model.

    Why Proper Maintenance Matters?

    Consistent care helps preserve measurement accuracy and reduces problems caused by spills, residue, or damaged battery contacts. A clean scale is also easier to use during daily meal preparation and less likely to develop avoidable surface damage.

    Routine Cleaning for Lasting Accuracy

    Routine cleaning prevents crumbs, flour, grease, and liquids from collecting around important surfaces. Use minimal moisture and gentle materials so cleaning does not affect internal electronics.

    Cleaning the Weighing Surface

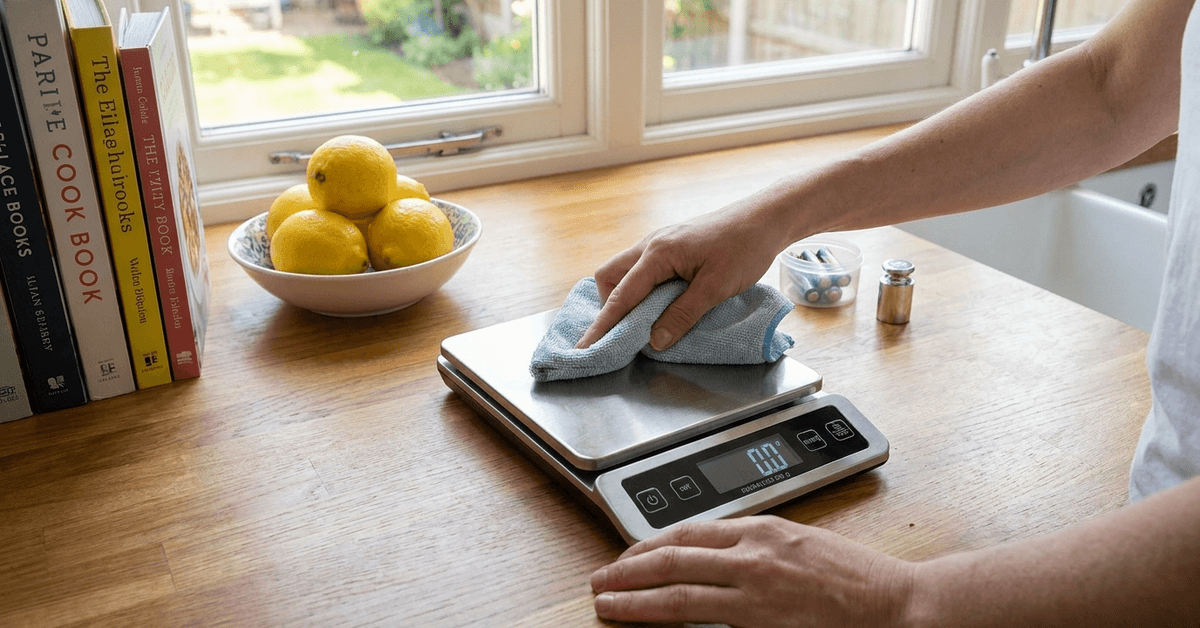
    The platform often collects crumbs, flour, oil, and other food residue during normal use. Wipe it with a soft microfiber cloth that is dry or only slightly damp. For stubborn spots, use mild dish soap if the manufacturer permits it, then dry completely.

    Clearing the Display and Buttons

    Fingerprints and particles can make the digital display harder to read and collect around buttons. 

    Wipe the screen gently with a soft cloth and use a lightly dampened cotton swab around accessible edges. Avoid spraying cleaner directly onto the control area or nearby seams.

    Protecting Internal Components

    Moisture entering seams can interfere with electronic components and weighing sensors. 
    How to Maintain a Digital Kitchen Scale for Accurate Results

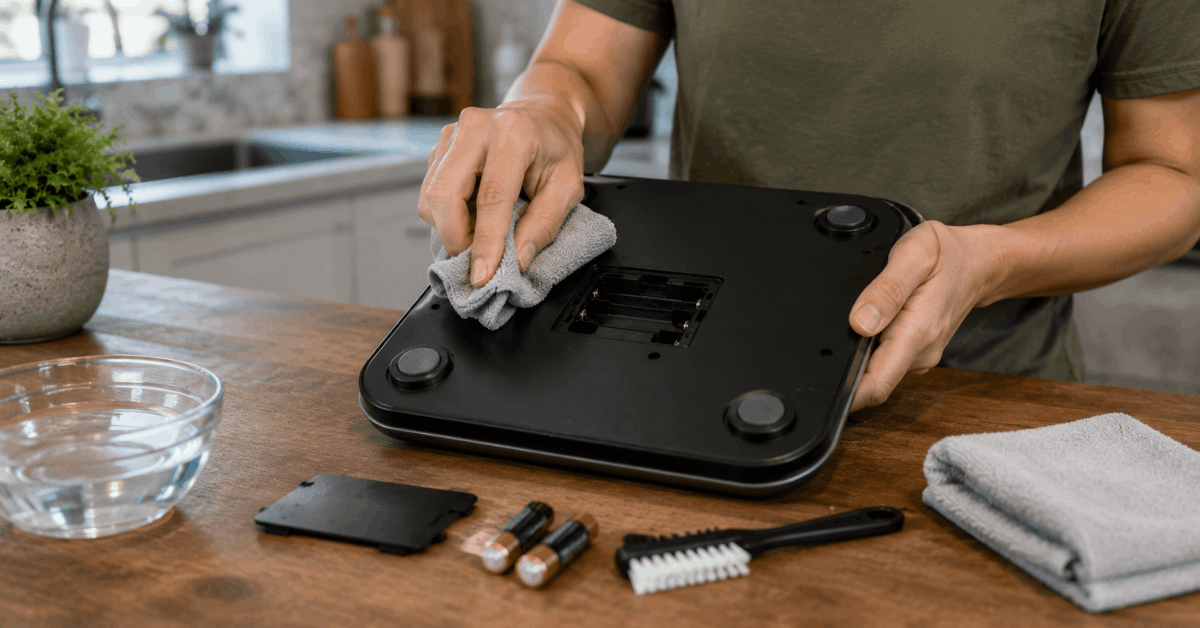
    Clean by wiping rather than rinsing the entire scale unless the product is specifically designed for washing. Keep the battery compartment dry to reduce corrosion and unreliable connections.

    Step-by-Step Guide: Cleaning Your Scale Safely

    A simple cleaning sequence protects the scale while removing residue. Use soft cleaning tools and avoid excessive liquid around electronic areas.

    1. Turn the scale off and remove batteries if recommended.
    2. Brush away loose crumbs.
    3. Wipe the platform with a barely damp microfiber cloth.
    4. Clean around buttons and the display carefully.
    5. Use mild dish soap on stubborn residue when approved.
    6. Never spray water directly onto the scale.
    7. Dry every accessible surface completely.
    8. Reinstall batteries only after the scale is fully dry.

    Battery Care and Replacement Tips

    The battery compartment needs protection from moisture and debris. Regular checks help maintain steady power and protect the contacts from corrosion damage.

    • Inspect battery contacts periodically.
    • Replace batteries when the display becomes dim or inconsistent.
    • Use the battery type specified by the manufacturer.
    • Follow the correct polarity markings.
    • Remove batteries during long storage when recommended.
    • Keep the compartment completely dry.

    Calibration for Consistent Results

    Calibration helps confirm that a scale measures known weights correctly after movement or questionable readings. Follow the model-specific procedure because required weights and button sequences can differ.

    Using Standard Weights

    A calibration weight provides a known reference mass for models that support user calibration. Use the value specified by the manufacturer rather than an arbitrary household item. Food packages may not provide the required accuracy for precise calibration.

    How Often to Calibrate?

    Calibration frequency depends on how often the scale is used, moved, or bumped. Frequent users may check periodically, while occasional users may calibrate only when readings seem questionable. 

    Recalibrate after movement or impact when the manufacturer recommends it for consistent measurements.

    Essential Precautions for Everyday Use

    Careful habits protect the platform and the weighing mechanism underneath it. Keep the scale level, dry, and within its rated capacity for reliable performance.

    • Avoid placing very hot cookware directly on the platform.
    • Weigh liquids inside a separate bowl.
    • Do not exceed the maximum capacity.
    • Use the scale on a flat, stable surface.
    • Keep liquid away from seams and buttons.
    • Avoid dropping or jolting the scale.

    Common Issues and Quick Fixes

    Minor problems often come from uneven placement, weak batteries, or debris. Start with basic checks before assuming the scale has a permanent fault.

    Unstable or Flickering Readings

    Place the scale on a hard, level surface and ensure nothing touches the platform. Check underneath for crumbs that may prevent the feet from resting evenly. 

    If readings still fluctuate, replace the batteries and follow the recommended calibration procedure.

    Display Not Powering On

    Confirm that the batteries are correctly installed and have enough charge. Inspect accessible contacts for corrosion or debris while keeping liquids away from the compartment. If fresh batteries do not restore the digital display, consult the product instructions.

    Storing Your Digital Kitchen Scale

    A cool, dry cabinet protects the scale from moisture, grease, and impact between uses. Store it without heavy pressure on the weighing platform.

    • Avoid stacking heavy cookware on top.
    • Keep the scale away from sinks and dishwasher steam.
    • Protect glass surfaces from damage.
    • Remove batteries for long storage when recommended.
    • Use a sleeve or box for dust protection if needed.

    Material-Specific Cleaning Tips

    Platform material determines which cleaning method is least likely to leave scratches or streaks. Use non-abrasive cleaning and follow the product instructions before applying specialized cleaners.

    Stainless Steel Platforms

    Stainless steel can show fingerprints and smudges even when otherwise clean. Wipe with a soft damp cloth and mild dish soap when needed. Dry thoroughly to leave the steel surface clean without unnecessary abrasion.

    Tempered Glass Surfaces

    Tempered glass is easy to wipe but can still scratch when cleaned aggressively. Use a soft microfiber cloth with a manufacturer-approved cleaner for the glass platform. Dry fully and avoid spraying liquid near seams or controls.

    When to Consider Replacement?

    Replacement may be necessary when internal sensors or electronic components no longer provide reliable performance. Persistent calibration failures, display problems, damaged contacts, or unstable measurements can signal deeper issues. 

    If cleaning, fresh batteries, and proper setup do not restore dependable operation, replacing the device may be the safer choice.

    Conclusion

    Regular maintenance helps a digital kitchen scale remain clean and dependable for everyday food preparation. Gentle wiping, dry battery contacts, proper storage, and occasional calibration support measurement reliability

    Following manufacturer instructions also helps protect platform materials and electronic components. With a consistent maintenance routine, the scale can continue providing useful measurements while avoiding preventable problems.


  • Step-By-Step Appliance Maintenance Checklist for the Kitchen

    Step-By-Step Appliance Maintenance Checklist for the Kitchen

    Regular kitchen appliance maintenance helps keep everyday equipment reliable, efficient, and safe. Small routines can prevent residue and wear from becoming larger problems. 

    This guide explains daily and weekly care plus monthly and seasonal maintenance tasks. It also covers cleaning habits, scheduling, and common mistakes for better appliance performance.

    Why Kitchen Appliance Maintenance Matters?

    Short, consistent care can help prevent buildup, unnecessary strain, and overlooked appliance problems. Regular preventive maintenance habits also make it easier to notice small issues before they become expensive repairs.

    Step-By-Step Appliance Maintenance Checklist for the Kitchen

    Daily Appliance Maintenance Basics

    Simple daily habits help keep kitchen appliances cleaner and easier to maintain. Quick visual checks can also catch spills, crumbs, and residue before they become harder to remove.

    The ‘Wipe Down’ Rule

    Use a soft microfiber cloth to remove grease, fingerprints, and crumbs from appliance surfaces. Focus on high-contact areas such as refrigerator handles, oven knobs, and microwave doors. Spot-clean visible stains promptly to prevent stubborn buildup.

    Monitor Gasket and Rubber Seals

    Check refrigerator and dishwasher seals regularly for crumbs, moisture, or residue. Wipe accessible buildup with a damp cloth and mild, soapy water when appropriate. Keeping seals clean can help them close properly and remain in good condition.

    Weekly Maintenance Tasks

    Weekly maintenance helps control residue before it becomes difficult to remove. These simple tasks support cleanliness and normal appliance performance.

    Refrigerator Organization and Coil Check

    Remove expired food and wipe refrigerator shelves with an appropriate cleaner. Check vents and surrounding airflow areas for dust or obstructions. Vacuum accessible condenser coils only when recommended by the manufacturer.

    Microwave Care

    Remove and wash the microwave turntable in warm, soapy water when permitted. Wipe food splatters from the interior before they harden. Use only cleaning methods approved for the appliance.

    Step-By-Step Appliance Maintenance Checklist for the Kitchen

    Dishwasher Debris Removal

    Check the dishwasher filter regularly for trapped food particles. Rinse removable filters according to the appliance manual. Wipe the lower door edge to prevent hidden residue and odors.

    Monthly Appliance Deep Cleaning

    Monthly cleaning addresses areas that routine maintenance may overlook. Focus on hidden components and follow model-specific care instructions.

    Oven Interior and Racks

    Inspect oven racks and interior surfaces for baked-on grease or food residue. Clean removable racks with a non-scratch tool when appropriate. Let the oven cool completely before wiping the interior or door glass.

    Refrigerator Drip Pan and Ice Maker

    Some refrigerators have removable drip pans or ice-making parts that require periodic cleaning. Models such as Samsung refrigerators may have integrated ice makers that require model-specific care. Follow the manual before removing parts or applying vinegar-based cleaning solutions.

    Dishwasher Spray Arms

    Spray-arm openings can collect food particles or mineral deposits over time. Remove and rinse the arms only if the manufacturer allows it. Clear visible debris gently and reinstall each part securely.

    Seasonal and Quarterly Maintenance

    Seasonal maintenance helps address appliance areas that do not require frequent attention. Calendar reminders can make these occasional tasks easier to remember.

    Range Hood and Grease Filters

    Remove washable grease filters and clean them with warm, soapy water when appropriate. Let them dry completely before reinstalling them. Replace charcoal filters according to the manufacturer’s instructions.

    Small Appliance Power Cords

    Inspect appliance cords for cracks, fraying, or exposed wires. Keep cords away from heat, moisture, and sharp edges during use and storage. Stop using any appliance with a visibly damaged cord until it is repaired or replaced properly.

    Garbage Disposal Care

    Clean the disposal only with methods approved by the manufacturer. Flush with water as directed to help remove residue and odors. Never place your hands or unsuitable tools inside the disposal.

    Prolonging Appliance Lifespan: Expert Insights

    Appliances generally perform better when they are installed, loaded, and cleaned according to their design. These long-term care habits can reduce unnecessary strain and support more reliable operation.

    • Keep appliances level when installation instructions require it.
    • Do not overload machines such as dishwashers or refrigerators.
    • Keep ventilation openings clear.
    • Read user manuals for cleaning and filter replacement intervals.
    • Address unusual noises, leaks, or repeated errors promptly.

    How to Organize Your Maintenance Schedule?

    Consistency is easier when maintenance tasks are divided by frequency. A simple maintenance schedule system can keep important jobs from being forgotten.

    • Create a digital checklist for daily, weekly, and monthly tasks.
    • Use recurring calendar reminders for quarterly maintenance.
    • Keep appliance manuals in one accessible location.
    • Record major cleaning dates and filter replacements.

    Common Mistakes to Avoid

    Many kitchen appliance problems begin with habits that are easy to correct. Avoiding common maintenance mistakes protects finishes, airflow, removable parts, and electrical components.

    • Do not ignore unusual noises or leaks.
    • Avoid abrasive pads or harsh chemicals on delicate surfaces.
    • Do not block appliance vents or required ventilation spaces.
    • Never force removable components that resist normal removal.
    • Avoid immersing electrical components in water.

    Tips for Better Kitchen Appliance Maintenance

    Simple habits can make appliance care easier and more consistent. Focus on safe routines that support cleanliness and performance.

    • Follow the manufacturer’s instructions for cleaning and maintenance.
    • Clean spills and residue before they become stubborn buildup.
    • Check filters, seals, vents, and cords on a regular schedule.
    • Avoid harsh chemicals or abrasive tools on delicate surfaces.
    • Address unusual noises, leaks, or errors as soon as possible.

    Conclusion

    Maintaining kitchen appliances with simple regular routines supports cleaner and more reliable everyday use. Daily wiping, weekly checks, monthly deep cleaning, and seasonal inspections make upkeep easier to manage. 

    Following manufacturer guidance also helps protect filters, seals, surfaces, and electrical components. A consistent maintenance schedule keeps appliances cared for and ready for regular kitchen use.