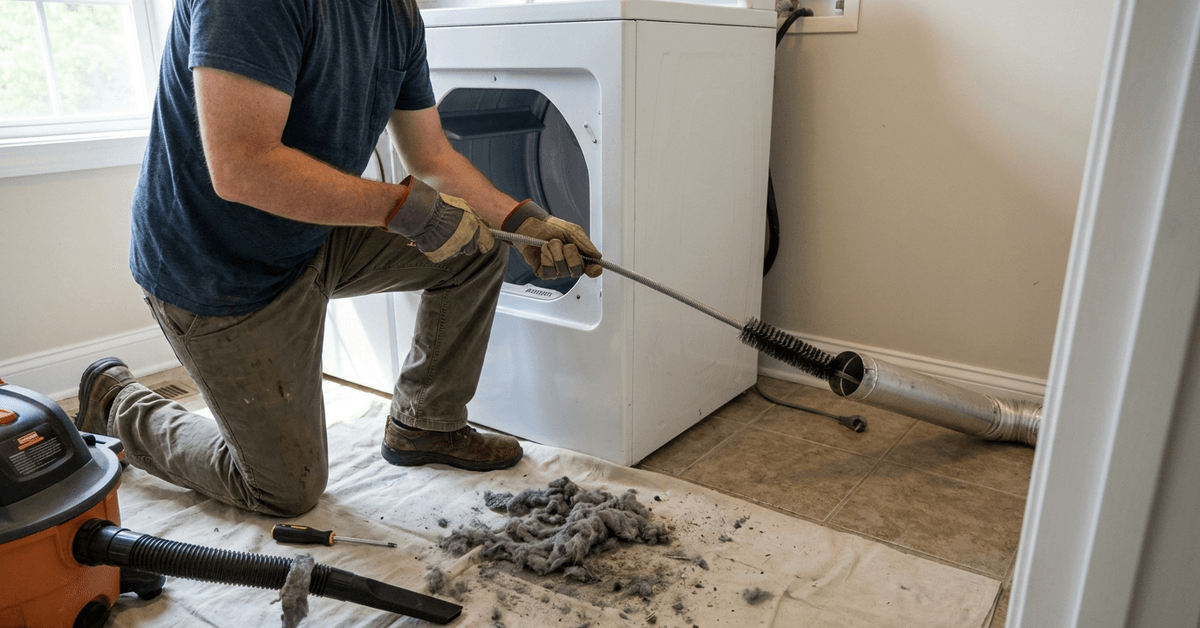
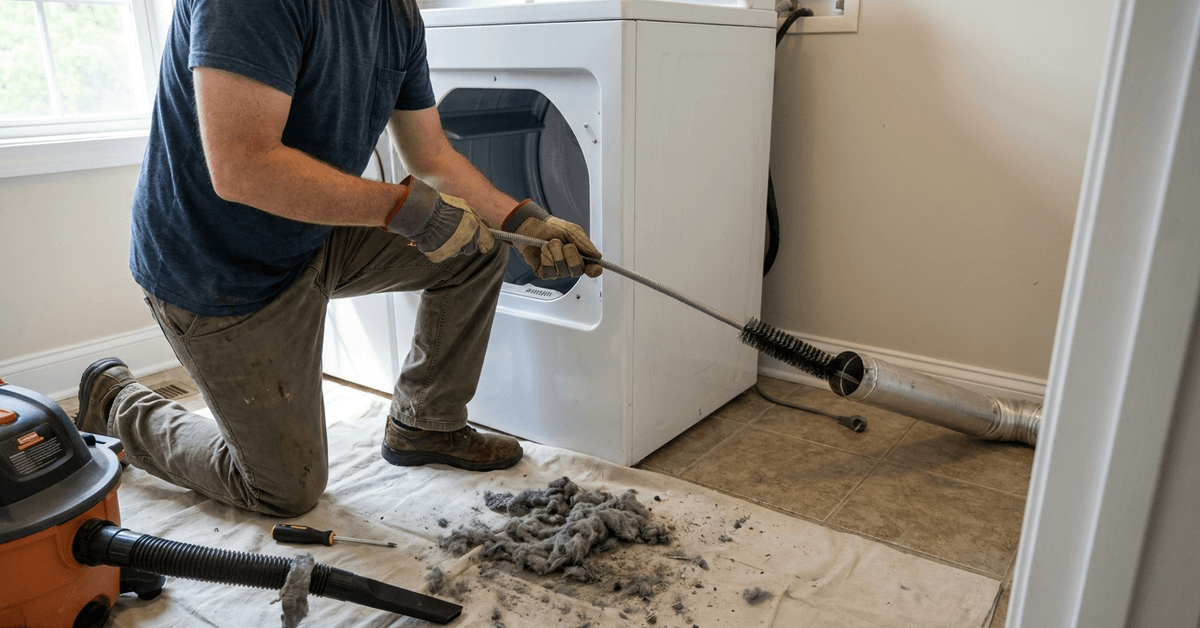
Clothes dryer vent pipes gradually collect lint and dust as warm, moist air moves outdoors. Heavy buildup can restrict airflow, lengthen drying times, and increase fire risk.
This guide explains how to inspect, disconnect, clean, reconnect, and maintain a dryer vent safely. It also covers warning signs, useful tools, prevention habits, and professional-service situations.
Why Lint Buildup in Dryer Vents Matters?
Fine lint can escape the filter and settle inside the exhaust duct, gradually restricting airflow and increasing drying time.
The U.S. Fire Administration identifies failure to clean as a leading factor in home clothes-dryer fires, making routine vent care an important safety habit.
How Dryer Vent Pipes Work?
A vent pipe carries hot, moist air from a dryer to an exterior outlet. Excessive length, bends, and crushed sections can reduce steady airflow through the system.
A vented dryer from Whirlpool shows how these appliances connect to an exhaust system. Follow the installation requirements for the exact model.
Signs Your Dryer Vent Needs Cleaning
Several changes can indicate restricted airflow. Check the vent if normal loads take longer or the laundry area becomes unusually warm.
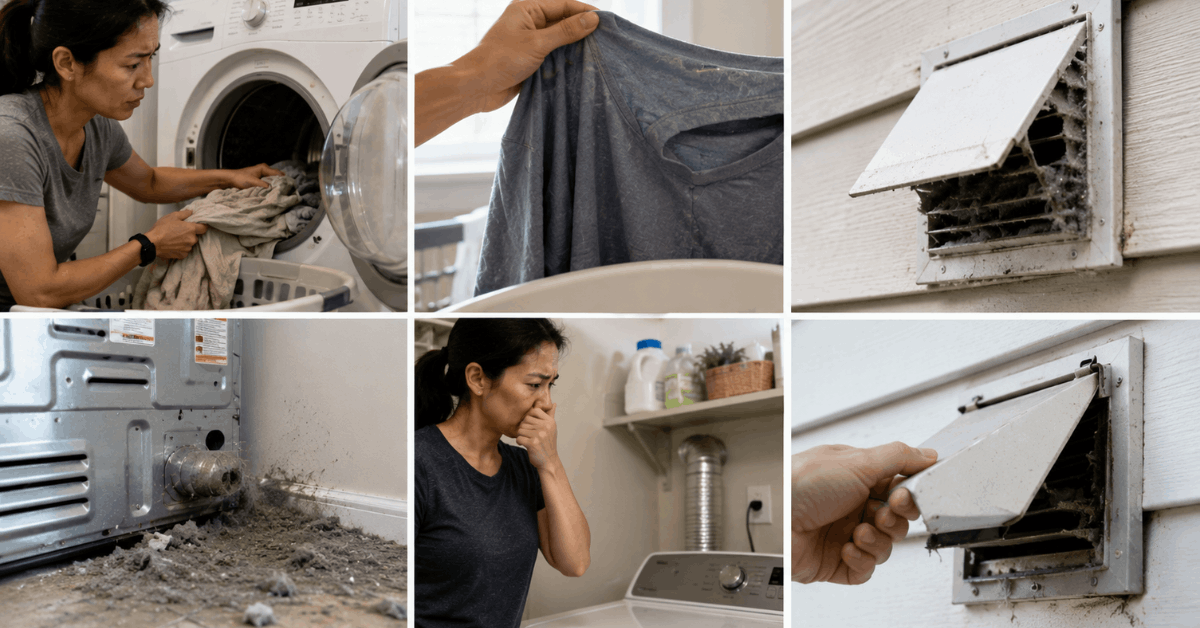
- Longer drying times
- Clothes feel hotter than expected
- Visible lint near the wall or exterior vent
- Burning, dusty, or musty odors
- Exterior vent flap does not open properly
Tools and Supplies for Lint Removal
Basic supplies make vent cleaning easier. Choose tools designed for dryer ducts and avoid sharp equipment that could damage the pipe.
- Vacuum cleaner with hose attachment
- Flexible dryer vent brush kit
- Screwdriver
- Flashlight
- Protective gloves
Step-by-Step Guide: Removing Lint Buildup
A systematic approach keeps lint removal organized from the dryer connection to the outdoor outlet. Disconnect power first and avoid crushing the vent pipe.
1. Unplug and Prepare Your Dryer
Turn the dryer off and disconnect it from electrical power before moving or cleaning it. For a gas model, follow the manufacturer’s instructions for shutting off the gas supply. Move the appliance only far enough to reach the rear vent connection safely.
2. Disconnect the Vent Pipe
Locate the clamp, screws, or connector holding the exhaust duct to the dryer. Loosen the fastener carefully and separate the pipe without twisting or crushing it. Keep small hardware together for easy reassembly.
3. Initial Lint Removal by Hand
Wear gloves and remove large lint clumps visible at the duct openings. Use a flashlight to inspect for additional buildup or damage. Avoid reaching deeply into sharp metal edges.
4. Using a Vent Cleaning Brush Kit
Insert the flexible brush gently and advance it according to the tool instructions. Rotate and withdraw it periodically so loosened lint comes out instead of moving deeper. Repeat until the reachable section appears substantially clear.
5. Vacuuming Residual Lint
Vacuum loose fibers around the dryer exhaust port, duct opening, and wall connection. Avoid forcing the hose into fragile ducting. Inspect the openings again with a bright flashlight.
6. Clean the Exterior Vent Cover
Check the outdoor outlet for lint, leaves, or other airflow blockages. Remove accessible debris and confirm that the flap moves freely. Avoid damaging the cover or surrounding weather-protection parts.
7. Reassemble and Test the System
Reconnect the duct securely without leaving it crushed or kinked. Restore power and follow manufacturer directions for restoring gas service when applicable. Run a short cycle and check for normal exterior airflow.
Tips for Preventing Future Lint Buildup
Simple habits reduce how quickly vent restrictions develop. Good airflow begins at the lint filter and continues through a clear exhaust path.
- Clean the lint filter after every load.
- Keep the duct route short and straight where possible.
- Avoid crushing the vent behind the dryer.
- Check behind the appliance for loose lint.
- Inspect the exterior flap regularly.
- Arrange professional cleaning when the full duct cannot be reached.
ENERGY STAR recommends cleaning the lint filter after every load to support better air circulation and dryer efficiency. Regular filter care also complements vent maintenance between deeper cleanings.
Common Mistakes to Avoid
Dryer vent cleaning involves heat, electricity, and sometimes gas, so shortcuts can create unnecessary risk. Avoid methods that damage the duct or leave hidden blockages.
- Never clean while the dryer is connected to power.
- Do not ignore the exterior outlet.
- Avoid sharp tools that can puncture ducting.
- Do not reinstall damaged vent sections.
- Avoid pushing lint deeper into inaccessible areas.
- Leave internal electrical or gas repairs to professionals.
Recommended Maintenance Schedule
A simple schedule keeps dryer maintenance easy to remember. Increase checks if drying time rises or airflow weakens.
- After every load: Clean the lint filter.
- Monthly: Check behind the dryer.
- Periodically: Inspect the exterior vent.
- At least annually: Clean the full vent ductwork.
- When performance changes: Check airflow promptly.
The U.S. Fire Administration recommends cleaning dryer vent ductwork every year and cleaning lint filters whenever the dryer is used. Manufacturer instructions may call for additional maintenance depending on the installation.
When to Consult a Professional
Long ducts, roof outlets, hidden wall runs, or persistent airflow problems may require professional cleaning equipment. Seek service if the duct cannot be reached safely or overheating continues after basic cleaning.
Gas connections and internal repairs require additional care. Consult a qualified technician when the problem extends beyond routine vent maintenance.
Frequently Asked Questions
These questions cover vent materials, fire risk, replacement timing, and cleaning tools. Follow the dryer manual and local installation requirements when they provide more specific guidance.
What Is the Safest Vent Pipe Material?
Rigid or semi-rigid metal ducting is generally preferred for dryer exhaust systems. Deeply ridged flexible materials can collect lint or become crushed. Use only materials permitted by the manufacturer and local requirements.
Can a Clogged Vent Cause a Fire?
Lint can restrict airflow and contribute to excess heat buildup inside dryer exhaust systems. Federal fire-safety guidance recommends keeping lint filters and dryer vents clean. Persistent overheating or burning odors should be treated as a serious warning sign.
How Often Should Vent Pipes Be Replaced?
Vent pipes do not need replacement on a fixed schedule when they remain secure and undamaged. Inspect for crushing, separation, corrosion, holes, or other deterioration during cleaning. Replace damaged sections with approved duct material.
What Are the Best Tools for Cleaning?
A flexible vent brush helps loosen deep lint buildup in accessible duct runs. A vacuum hose can collect loose fibers after brushing. Long runs may require professional equipment.
Conclusion
Regular dryer vent cleaning supports steady airflow and reduces lint throughout the exhaust path. Disconnecting power, using suitable brushes, and cleaning the exterior outlet make maintenance safer and easier.
A consistent schedule also helps identify damaged ducts or declining airflow early. With routine vent care, a dryer can operate efficiently while supporting a safer laundry area.