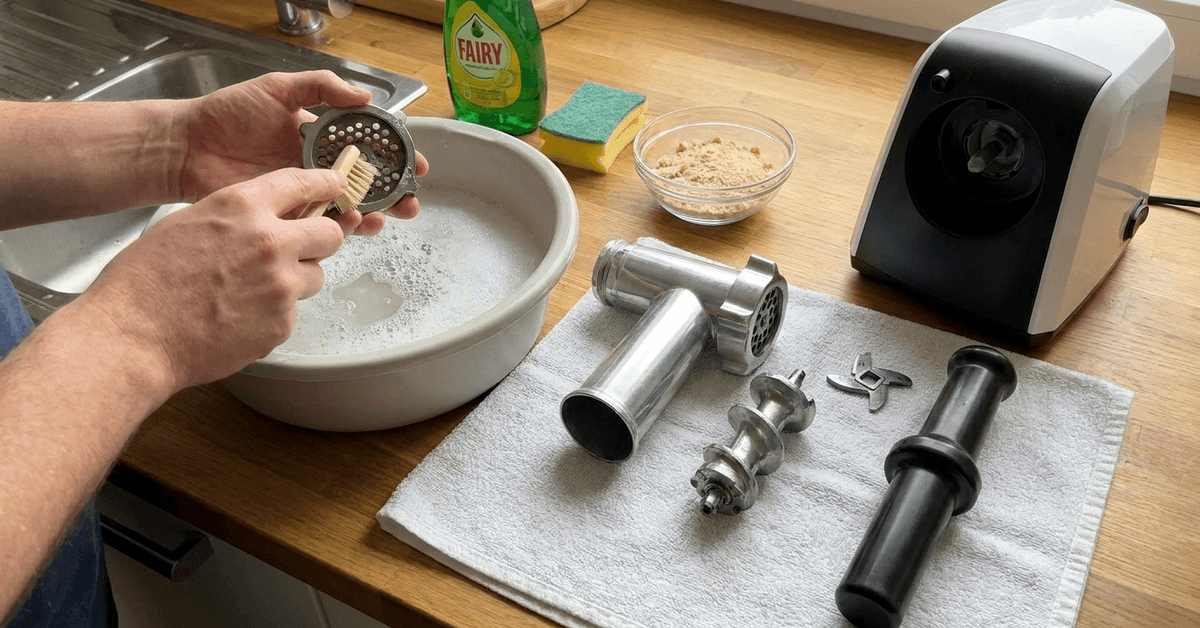
Cleaning an electric meat grinder after every session supports food hygiene and performance in the kitchen. Meat, fat, and protein can remain inside small parts if the grinder is stored without proper cleaning.
This guide explains how to disassemble, wash, dry, reassemble, and maintain the appliance safely. It also covers cleaning tools, common mistakes, and simple routines that can protect the grinder over time.
Why Prompt Cleaning Matters for Meat Grinders?
Fresh meat residue can become sticky and difficult to remove from blades, plates, and narrow channels. Cleaning soon after use also limits odors and keeps future batches fresh without old residue affecting the next grinding session.
Main Parts of an Electric Meat Grinder to Clean
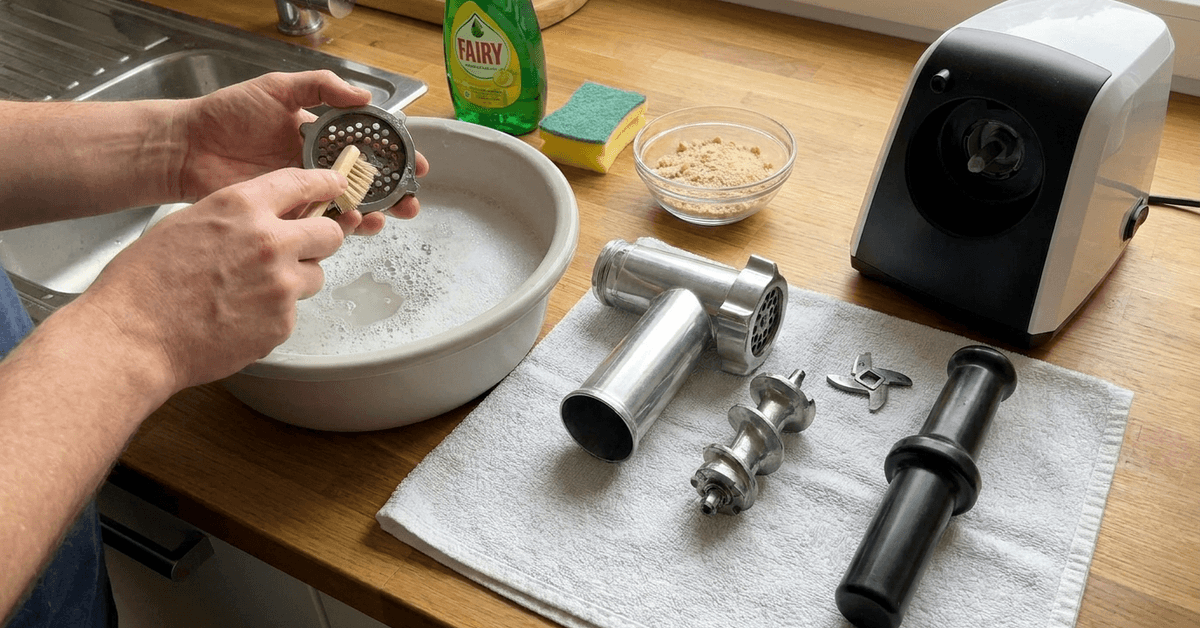
Knowing the main components helps ensure every food-contact area receives attention after grinding. Check each removable part because small crevices can hold fat and meat even when the grinder looks clean.
- Feed tube: The channel where meat enters the grinder.
- Auger: The spiral part that pushes meat toward the blade.
- Cutting blade or knife: Slices meat before it reaches the plate.
- Grinding plate: The perforated disc that determines grind texture.
- Food pusher: Guides meat through the feed tube.
- Hopper: The tray that holds prepared meat.
- Housing: The motor body and exterior surfaces.
For example, LEM offers an official electric meat grinder product page that can help owners identify model-specific components before cleaning. Always use the manual for the exact grinder model when removal or washing instructions differ.
Tools and Materials for Safe Cleaning
A few gentle tools make grinder cleanup easier without scratching metal or damaging finishes. Gather supplies before disassembly so washed parts can move directly to a clean drying area.
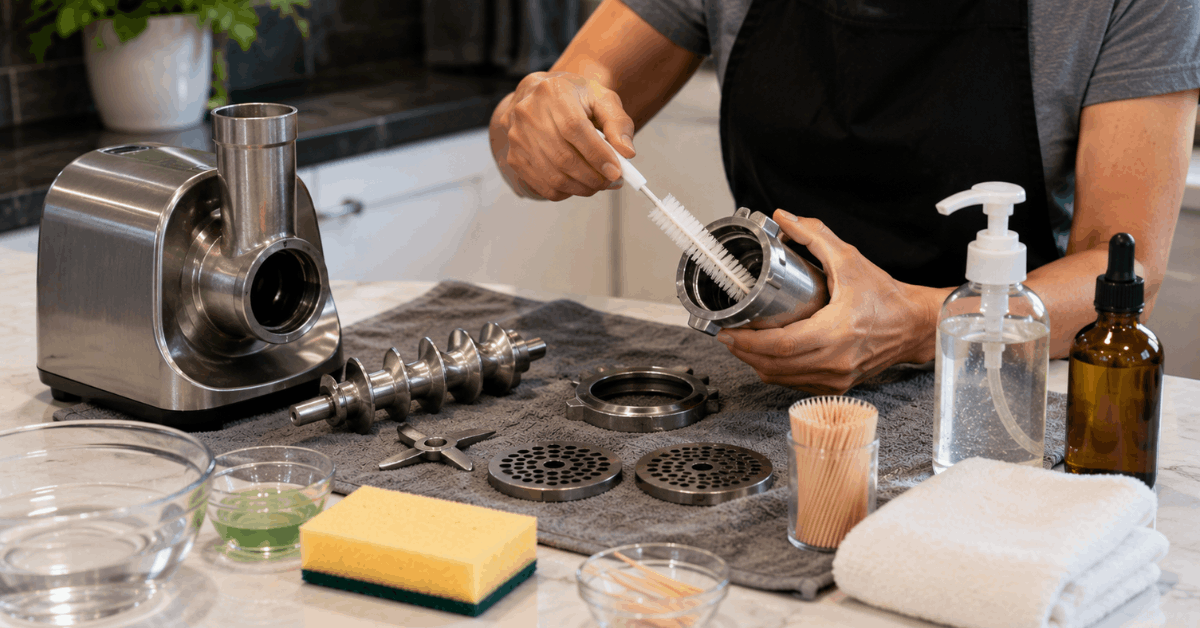
- Soft nylon brush: Reaches plate holes and auger grooves.
- Mild dish soap: Helps loosen grease and protein residue.
- Non-abrasive sponge: Useful for washable surfaces.
- Toothpick or wooden skewer: Helps clear small plate openings.
- Lint-free towel: Dries parts without excess fibers.
- Food-grade mineral oil: Optional for compatible metal parts.
- Warm water: Useful for approved hand washing.
Essential Safety and Preparation Steps
Switch the grinder off and disconnect electrical power before touching blades or removable parts. Prepare a clean towel and drying rack so sharp pieces can be handled with controlled movements instead of mixing with other dishes.
Keep the motor base away from standing water. Handle the blade by safer outer or center surfaces rather than touching the sharp cutting edges directly.
Step-by-Step Process: How to Clean an Electric Meat Grinder After Use
A consistent sequence makes post-use cleaning faster and reduces the chance of missing residue. Keep components arranged in order so reassembly stays simple after drying.
Disassembly of Parts
Remove components slowly so blades and plates do not fall into the sink. Keep small pieces together on a clean towel for safe handling and easier reassembly.
- Remove the food pusher and hopper tray.
- Detach the grinder head or feed tube as directed.
- Slide out the auger carefully.
- Detach the blade and grinding plate without touching the edge.
- Place each part on a clean surface.
Initial Food Residue Removal
Removing loose meat before washing prevents greasy debris from spreading through the sink. If using the bread-clearing technique, do it before disassembly and only when the manufacturer permits it.
- Remove visible scraps from the feed tube, auger, blade, and plate.
- Wipe away loose fat when needed.
- Discard meat scraps immediately.
- Keep raw residue away from clean dishes.
Main Washing Process
Warm soapy water and gentle brushing remove fat and protein from washable parts. Focus on grooves and plate holes where small food particles often remain.
- Fill a clean sink or basin with warm water and mild dish soap.
- Wash only components identified as washable.
- Scrub the auger and feed tube with a soft nylon brush.
- Clean both sides of the blade and grinding plate carefully.
- Clear clogged plate holes with a toothpick or small brush.
- Wash the food pusher and hopper.
Cleaning the Motor Base
The motor section requires surface cleaning only because water can damage electrical components. Use a lightly damp cloth instead of spraying cleaner onto the grinder housing.
- Wipe grease and fingerprints with a damp cloth and mild soap.
- Follow with a clean damp cloth if needed.
- Dry the housing immediately.
- Dust vents and buttons with a dry soft brush.
- Never immerse the motor base.
Rinsing and Drying Parts
Complete rinsing removes soap and residue before storage. Thorough drying matters because moisture can encourage rust or odors on susceptible components.
- Rinse washable pieces with clean warm water.
- Check plate holes and auger grooves.
- Pat parts dry with a lint-free towel.
- Air-dry components completely.
- Do not reassemble while surfaces remain damp.
Reassembling and Storing the Grinder
Reassemble only after every component is completely clean and dry. Proper storage keeps the blade and plate protected while limiting moisture exposure.
- Apply food-grade mineral oil only to compatible metal parts when recommended.
- Reassemble without forcing or over-tightening parts.
- Protect blades and plates from accidental contact.
- Store the grinder in a clean, dry area.
- Keep the power cord dry and organized.
Routine Maintenance Tips for Efficiency and Hygiene
Regular maintenance helps keep the grinder clean, efficient, and dependable during use. Small inspections can also reveal wear, corrosion, or loose components before they cause larger problems.
Inspect Key Components
Check the blade, plate, auger, and fittings for visible wear or residue. Look for rust, chips, cracks, or other signs of damage. Clean or replace affected parts according to the manufacturer’s instructions.
Confirm Proper Reassembly
Make sure all removable parts fit securely after cleaning. Avoid forcing or over-tightening threaded components during assembly. Correct reassembly helps support smooth and reliable operation.
Monitor Performance During Use
Listen for unusual grinding, rattling, or other unfamiliar sounds. Changes in performance may indicate worn parts or improper assembly. Replace damaged components only with compatible replacements.
Common Mistakes to Avoid When Cleaning
Incorrect cleaning methods can damage electrical parts, metal surfaces, or sharp components. Gentle cleaning, thorough drying, and careful handling help protect the grinder.
Protect Electrical Components
Never submerge the motor base or rinse electrical areas with water. Use a lightly damp cloth for approved exterior surfaces only. Keep plugs, controls, and openings completely dry.
Avoid Abrasive Cleaning Methods
Do not use steel wool, aggressive scrubbers, or unapproved harsh chemicals. Abrasive tools can scratch metal surfaces and damage protective finishes. Choose soft brushes, cloths, and manufacturer-approved cleaners instead.
Dry and Handle Parts Carefully
Dry all metal parts completely before reassembly or storage. Remove food residue promptly to prevent odors and buildup. Handle sharp blades carefully and avoid over-tightening components.
Conclusion: Keeping Your Electric Meat Grinder Clean and Efficient
A consistent cleaning routine keeps an electric meat grinder hygienic and ready for its next use. Prompt disassembly, gentle washing, careful blade handling, and complete drying reduce stubborn residue and moisture problems.
Regular inspection also helps identify worn parts before they affect grinding. With simple maintenance habits, cleanup becomes a predictable part of food preparation.