Compact freezers are useful kitchen appliances for storing frozen foods in small homes, dorms, and shared apartments. Over time, thick frost can reduce storage space and interfere with cold-air circulation.
This guide explains how to prepare, defrost, clean, restart, and maintain a compact freezer safely. It also covers time-saving methods, prevention tips, and situations that may require professional service.
Why Defrosting a Compact Freezer Matters?
Frost buildup can reduce usable storage space and make drawers, shelves, or doors harder to operate. Regular defrosting also helps maintain efficient airflow around stored food and cooling surfaces.
A thick layer of ice can crowd packages and make the interior harder to organize. It may also force users to rearrange food around frozen sections or jammed compartments. Keeping frost under control makes routine freezer use simpler and more predictable.
What to Know Before Defrosting?
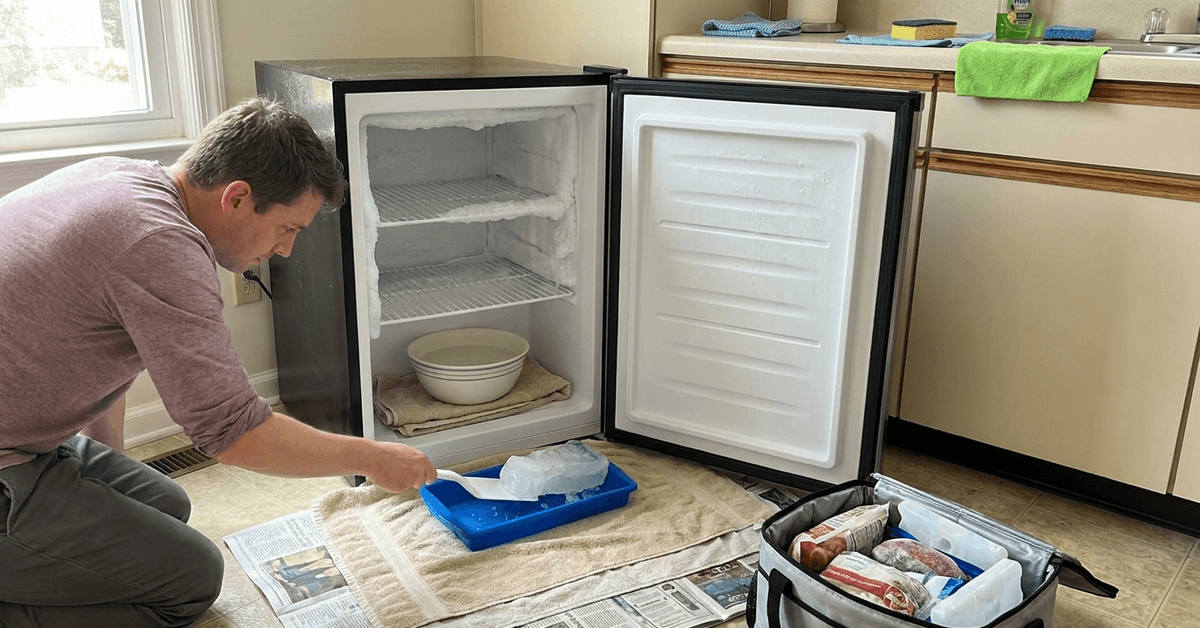
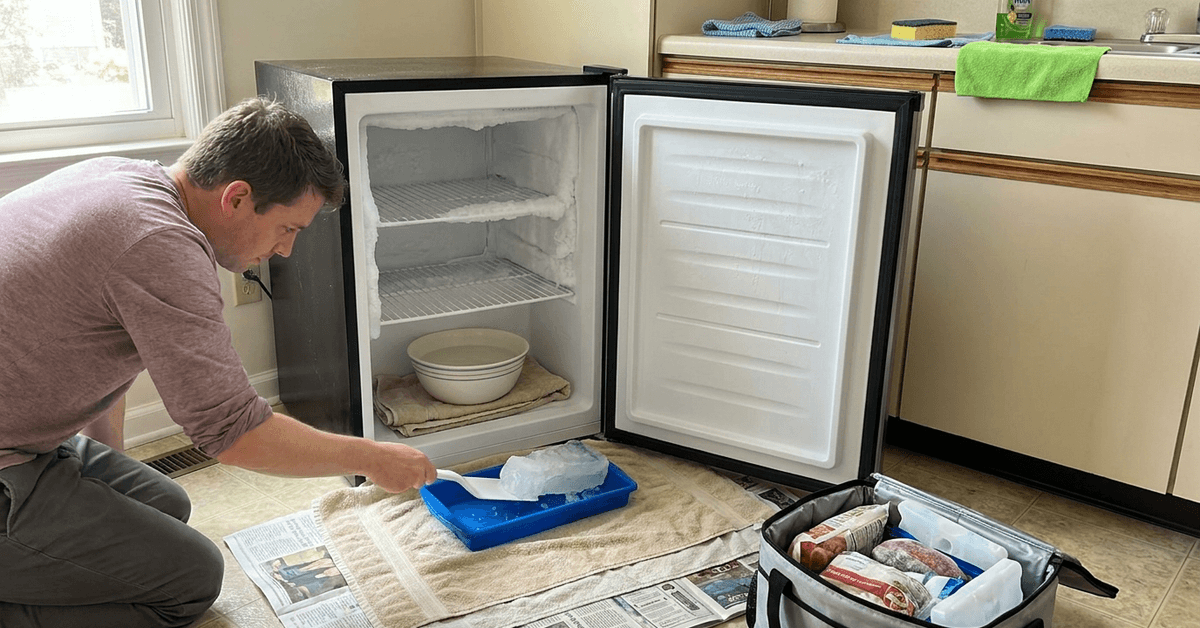
Safe preparation starts by unplugging the freezer and protecting nearby flooring from meltwater and spills. Gathering supplies beforehand keeps the defrosting process organized once the ice begins to soften.
- Absorbent towels for collecting meltwater
- Plastic or silicone spatula
- Bowls or shallow trays
- Cooler bags or insulated bins
- Mild dish soap
- Soft sponge
- Microfiber cloth
- Ice packs for temporarily storing frozen food
Move perishable food into an insulated cooler before leaving the freezer open. If you own a Midea freezer or another brand, check the specific product manual before beginning appliance maintenance.
Step-by-Step: Quick and Safe Defrosting
A careful sequence limits water mess while protecting the liner, shelves, and electrical components. Allow ice to soften before attempting removal so the interior is not damaged by forceful scraping.
1. Remove Food and Shelves
Transfer frozen food into a cooler with ice packs before the freezer temperature begins rising.
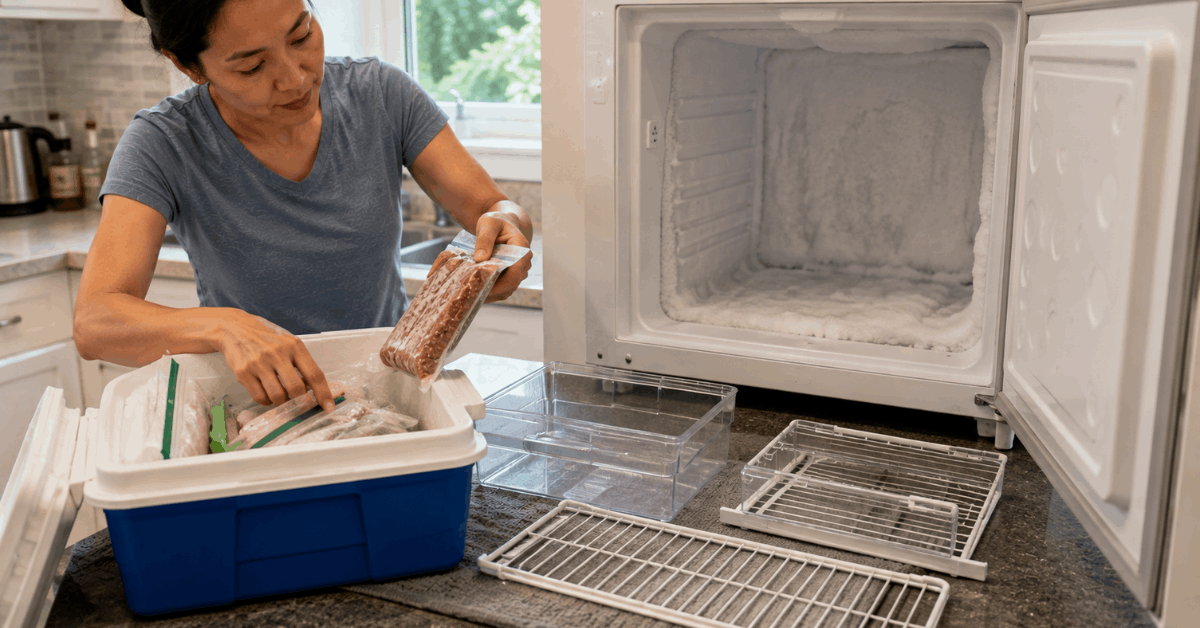
Remove detachable shelves, baskets, and drawers only when they release easily. Set these pieces aside for separate cleaning once the defrosting area is prepared.
2. Position Towels and a Tray
Place absorbent towels inside and around the freezer to collect melting ice water. A shallow tray near the door can catch overflow before it reaches the floor. Check the towels regularly and replace or wring them out when they become heavily saturated.
3. Allow Ice to Soften
Leaving the unplugged freezer door open allows room-temperature air to soften thick frost naturally.
For faster melting, place a bowl of hot but not boiling water inside on a heat-resistant surface. Keep water containers stable and away from electrical areas.
4. Gently Remove Chunks
Once ice loosens naturally, remove pieces with a plastic or silicone tool rather than metal utensils. Work slowly and never pry against the freezer liner or cooling surfaces. Patient removal reduces the chance of punctures or cracks.
5. Clean and Dry Surfaces
After the ice is gone, wash accessible interior surfaces with mild soapy water and a soft sponge. Wipe away cleaning residue with a clean damp cloth. Dry the walls, floor, gasket, shelves, and drawers thoroughly to limit remaining moisture.
6. Restarting and Restocking
Reconnect the freezer only after the interior and removable parts are fully dry. Allow the appliance to return to its recommended operating temperature before adding food. Replace shelves and bins securely, then restock without blocking airflow areas.
Top Ways to Speed Up Defrosting With Caution
Some gentle methods can shorten the wait without exposing the appliance to unnecessary heat or damage. Avoid shortcuts involving direct high heat, sharp tools, or boiling water.
- Place a bowl or pan of hot water on a heat-resistant surface inside the unplugged freezer.
- Replace the water when it cools if more melting is needed.
- Use a room fan outside the freezer to circulate ambient air when practical.
- Avoid knives, screwdrivers, metal scrapers, or other sharp tools.
- Never pour boiling water directly onto ice, liners, shelves, or seals.
Hairdryers and other electrical heating devices introduce additional heat and moisture risks around melting water. Natural airflow and hot-water bowls provide a more controlled approach for most households.
How Often Should You Defrost?
The right interval depends on frost accumulation, humidity, door opening, and the freezer design. Manual-defrost units should be cleaned when ice begins reducing usable space or interfering with normal operation.
A calendar reminder can help owners check the interior every few months. Auto-defrost models require different care, so follow the manufacturer schedule instead of applying a manual-defrost routine unnecessarily.
Cleaning and Organizing Tips After Defrosting
A fully defrosted freezer creates a convenient opportunity to clean accessories and improve food organization. Work with dry components before returning food to the appliance.
Clean Interior Accessories
Shelves, baskets, and ice trays can collect food residue and spills over time. Wash removable pieces with mild dish soap when their care instructions allow it. Rinse and dry each item completely before returning it to the freezer.
Disinfect High-Touch Areas
The door handle, gasket, and frequently touched surfaces may need extra cleaning attention. Use only cleaners that are compatible with the appliance materials. Wipe treated surfaces clean and dry so chemical residue does not remain.
Organize and Inventory
Sorting food into categories makes the available freezer space easier to use after defrosting. Group proteins, vegetables, prepared meals, and frequently used items in predictable areas. Adding dates to packages can support better food rotation.
Extra Prevention Tips
A few everyday habits can slow future frost buildup and make the next maintenance session easier. Focus on limiting warm, humid air and keeping the door seal effective.
- Keep the freezer door closed whenever possible.
- Inspect the gasket regularly for damage or poor contact.
- Let hot foods cool appropriately before freezing.
- Avoid overcrowding shelves or blocking airflow.
- Wipe moisture or spills before they freeze onto surfaces.
- Keep packages arranged so the door closes completely.
When to Seek Professional Help?
Persistent frost, leaks, unusual noises, or a door that no longer seals may indicate an appliance problem rather than ordinary maintenance. Electrical repairs, refrigerant work, and internal component replacement should be left to a qualified technician.
If the freezer stops cooling correctly after defrosting, disconnect it and follow the manufacturer’s service guidance. Warranty coverage may apply depending on the model, purchase date, and warranty terms.
Conclusion
Regularly defrosting a compact freezer restores usable storage space and keeps the interior easier to clean and organize. Unplugging the unit, protecting the floor, softening ice naturally, and using non-metal tools reduce avoidable damage.
Thorough drying and careful restocking also help limit rapid frost return. With a consistent maintenance routine, freezer defrosting becomes a manageable household task rather than a major project.