Category: Kitchen Efficiency & Gadget Guides

  • 10 Small Kitchen Tools Under $20 That Make Cooking Easier

    10 Small Kitchen Tools Under $20 That Make Cooking Easier

    Useful kitchen upgrades do not have to be expensive or complicated. Small, affordable tools can make everyday food preparation faster, tidier, and more convenient. 

    This guide highlights practical kitchen tools under $20 and explains how each one can simplify common cooking tasks. It also covers maintenance, storage, and buying tips to help you choose tools that fit your routine and budget.

    Why Simple Tools Save Time in the Kitchen?

    A kitchen can easily become cluttered with unnecessary appliances. Prioritizing the right basic equipment streamlines workspaces.
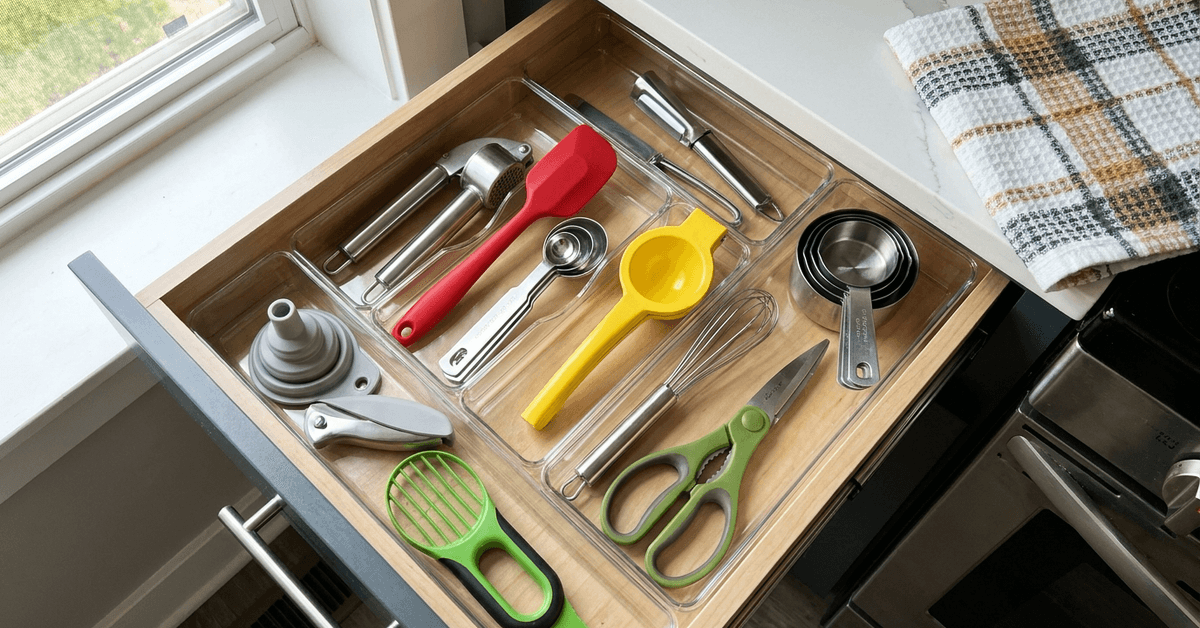
    Image 1

    Carefully chosen small kitchen tools minimize effort. Many of these items do not need electricity or complex assembly, lowering long-term maintenance and repair concerns.

    10 Affordable Kitchen Tools That Simplify Cooking

    These compact kitchen tools can make common cooking tasks faster, cleaner, and easier to manage. Most are simple to store, maintain, and use in everyday meal preparation.

    1. Garlic Press

    A garlic press crushes cloves quickly and helps reduce chopping time. Stainless steel varieties are generally durable and resistant to corrosion. For easier cleaning, choose a dishwasher-safe model or soak the hinge briefly before scrubbing.

    2. Silicone Spatula

    Heat-resistant silicone spatulas scrape bowls efficiently without scratching nonstick cookware. One-piece designs help prevent food from becoming trapped in seams. Rinsing promptly with warm, soapy water can also reduce staining and residue.

    3. Adjustable Measuring Spoons

    An adjustable measuring spoon can replace several individual spoons and reduce drawer clutter. Its sliding mechanism allows different measurements using a single tool. Sticky ingredients such as syrup are easier to remove when the spoon is cleaned soon after use.

    4. Handheld Citrus Juicer

    A handheld citrus juicer makes extracting juice from lemons and limes faster and less messy. Stainless steel and sturdy plastic models are compact enough for most drawers. Rinsing immediately after use helps prevent pulp from drying onto the surface.

    5. Mini Whisk

    A mini whisk works well for dressings, sauces, eggs, and small batches of batter. Its compact size makes it easier to maneuver inside cups and narrow bowls. 
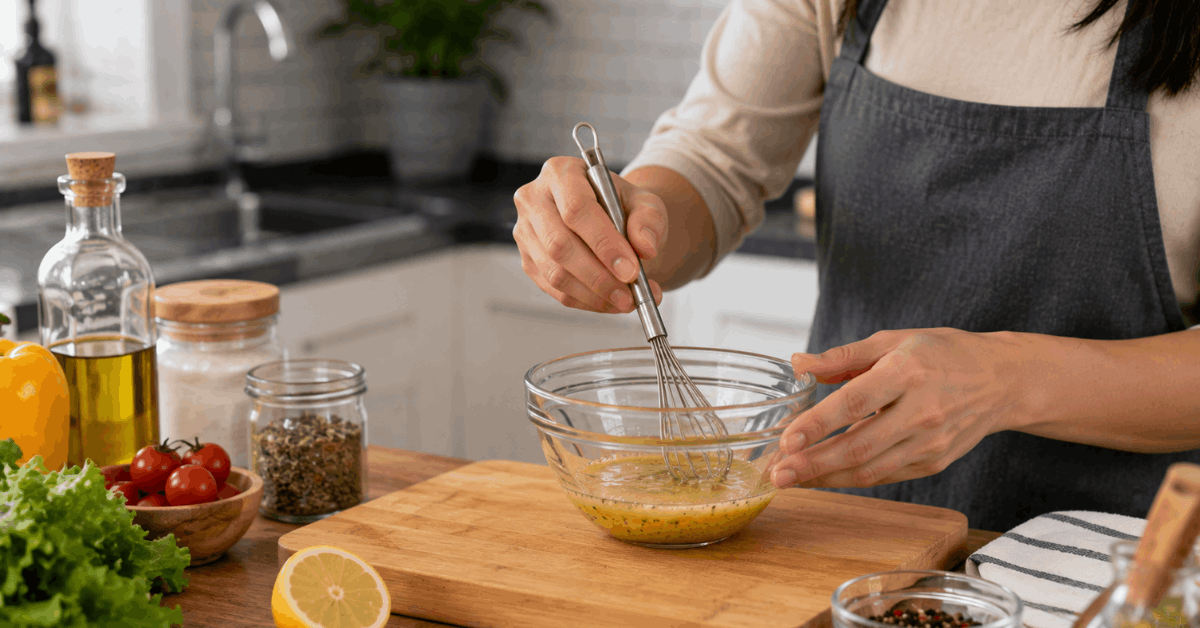
    Stainless steel models are durable, while prompt rinsing prevents residue from collecting between the wires.

    6. Clip-On Pot Strainer

    A clip-on pot strainer attaches directly to a pot for easier draining of pasta and vegetables. Silicone models are heat-resistant and eliminate the need for a separate colander. Most can be cleaned quickly under running water after use.

    7. Herb Scissors

    Herb scissors use multiple blades to cut chives, parsley, and other herbs quickly and evenly. They can reduce preparation time compared with repeated chopping using a knife. A small cleaning comb or soft brush helps remove herbs trapped between the blades.

    8. Magnetic Measuring Cups

    Magnetic measuring cups stack neatly together and help keep drawers organized. Built-in magnets reduce the chance of individual cups becoming separated or misplaced. 

    Drying them thoroughly after washing helps prevent moisture and residue from collecting between stacked pieces.

    9. Collapsible Funnel

    A collapsible funnel makes transferring liquids and dry ingredients into narrow containers easier. Silicone designs fold flat, making them useful for kitchens with limited storage space. Rinse and dry the funnel thoroughly after handling oils or other sticky ingredients.

    10. Avocado Slicer

    Working with avocados is less messy using an avocado slicer like OXO. It typically features a plastic blade for halving the fruit, a pitting slot, and a fan blade for even slicing.

    Many find it practical for guacamole or toast. Rinsing immediately prevents discoloration caused by avocado flesh.

    Tips for Maintaining Small Kitchen Tools

    Regular care helps keep small kitchen tools clean, functional, and longer-lasting. Choosing durable materials and organizing them properly can also make daily kitchen tasks more efficient.

    Choose Durable Materials and Clean Properly

    Stainless steel and food-grade silicone are often durable and easy to maintain. Rinse tools soon after use and clean them with soft brushes or sponges to prevent residue and scratches. Always check whether the item is dishwasher-safe before machine washing.

    Store Tools Efficiently

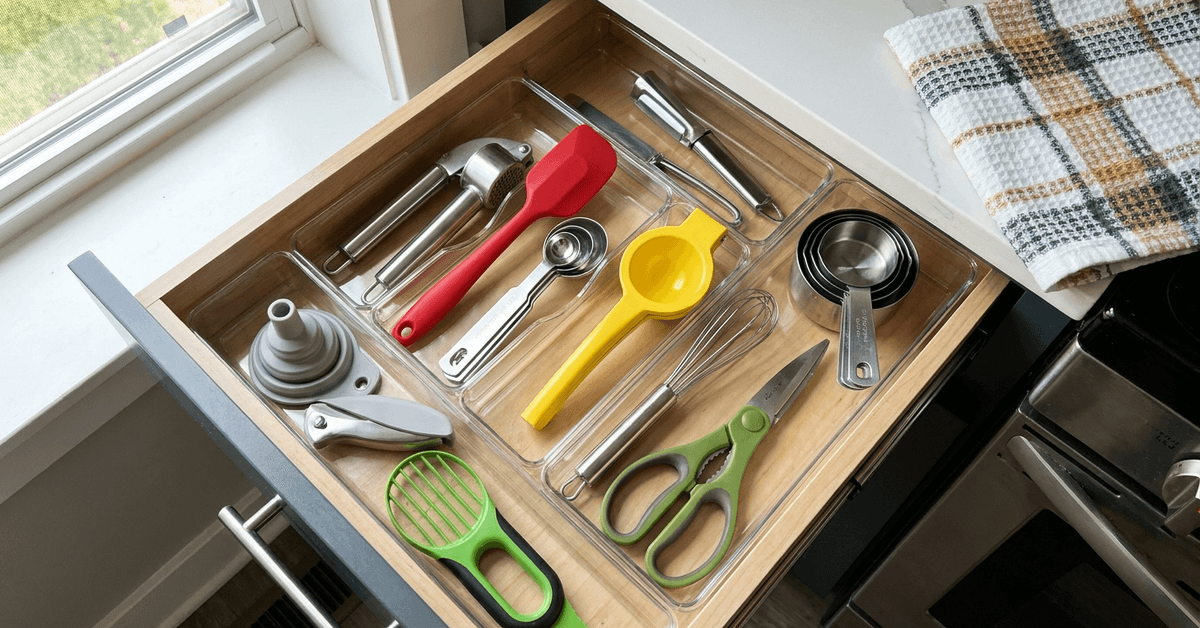
    Use drawer organizers to group tools by how often they are needed. Collapsible or stackable designs can help save space in smaller kitchens. Keep frequently used items near the front and less-used tools toward the back.

    How to Choose the Right Tool for Your Kitchen?

    Choosing the right kitchen tools starts with matching them to your cooking habits, available space, and budget. Practical, versatile tools can help save time and simplify everyday food preparation.

    Assess Your Cooking Habits

    The most practical tool for one kitchen may not fit the next. Evaluate which tasks take the most time or create the greatest mess.

    Consider Tool Versatility

    Favor tools that serve more than one purpose. For example, silicone spatulas assist in mixing, folding, and sautéing.

    Set a Realistic Budget

    Many quality kitchen helpers are sold individually for under $20. Combining these with a few existing staples can transform daily routines.

    Most Useful Tools Table

    A quick comparison can help identify which kitchen tools offer the most practical benefits for everyday use. Reviewing material, purpose, and typical price makes it easier to compare options before buying.

    Tool  Key Benefit  Material  Typical Price 
    Garlic Press  Fast mincing  Stainless Steel  $10-$18 
    Silicone Spatula  No scratching  Silicone  $5-$15 
    Adjustable Measuring Spoon  Multi-size  Plastic/Metal  $8-$15 
    Handheld Citrus Juicer  Rapid juice extraction  Steel/Plastic  $7-$18 
    Mini Whisk  Perfect small blends  Stainless Steel  $4-$12 
    Clip-On Pot Strainer  No heavy lifting  Silicone/Plastic  $8-$15 
    Herb Scissors  Uniform cuts  Stainless Steel  $9-$20 
    Magnetic Measuring Cups  Stackable  Plastic/Metal  $10-$20 
    Collapsible Funnel  Space-saving  Silicone  $6-$14 
    Avocado Slicer  Safer prep  Plastic/Steel  $7-$16 

    Conclusion

    Cooking efficiently can be easier with a few affordable and practical kitchen tools. Choosing items that match daily routines helps simplify preparation and cleanup. Durable materials such as stainless steel and silicone can also support long-term use. 

    With thoughtful choices, small kitchen upgrades can improve convenience, organization, and everyday meal preparation.
  • How to Organize Small Appliances to Maximize Countertop Space

    How to Organize Small Appliances to Maximize Countertop Space

    Managing small appliances well can improve kitchen workflow and keep counters easier to clean. Limited surfaces can quickly feel crowded when several gadgets compete for space. 

    This guide explains how to sort, place, store, clean, and manage appliances according to use. It also covers cord control, cabinet storage, and habits for maintaining a tidier workspace.

    How to Organize Small Appliances to Maximize Countertop Space

    Understanding Countertop Constraints and Appliance Needs

    Every kitchen has different counter dimensions, outlets, and storage limits that affect placement. Evaluating space alongside usage frequency helps determine which essential appliances deserve easy access.

    Identifying Daily Use Appliances

    A coffee maker, toaster, or microwave often supports everyday routines. Keeping frequently used items accessible reduces unnecessary lifting and cabinet movement. 

    Weekly-use tools such as blenders or food processors can stay nearby without occupying prime counter space.

    Recognizing Limited Countertop Surfaces

    Sinks, cooktops, and preparation zones can reduce usable countertop space. Measuring uninterrupted surfaces provides a clearer picture of what is actually available. Preserving enough open prep space should remain a priority.

    Quick Decluttering: Sorting and Paring Down

    Removing unnecessary appliances creates immediate space and simplifies organization. Sorting by frequency and condition also identifies unused gadgets that can move elsewhere.

    How to Organize Small Appliances to Maximize Countertop Space

    Decluttering Steps

    Starting with a clear surface makes available space easier to assess. Group appliances systematically before returning anything to the counter.

    • Empty the countertop completely so you can start fresh.
    • Wipe surfaces to remove dust, crumbs, grease, or stains.
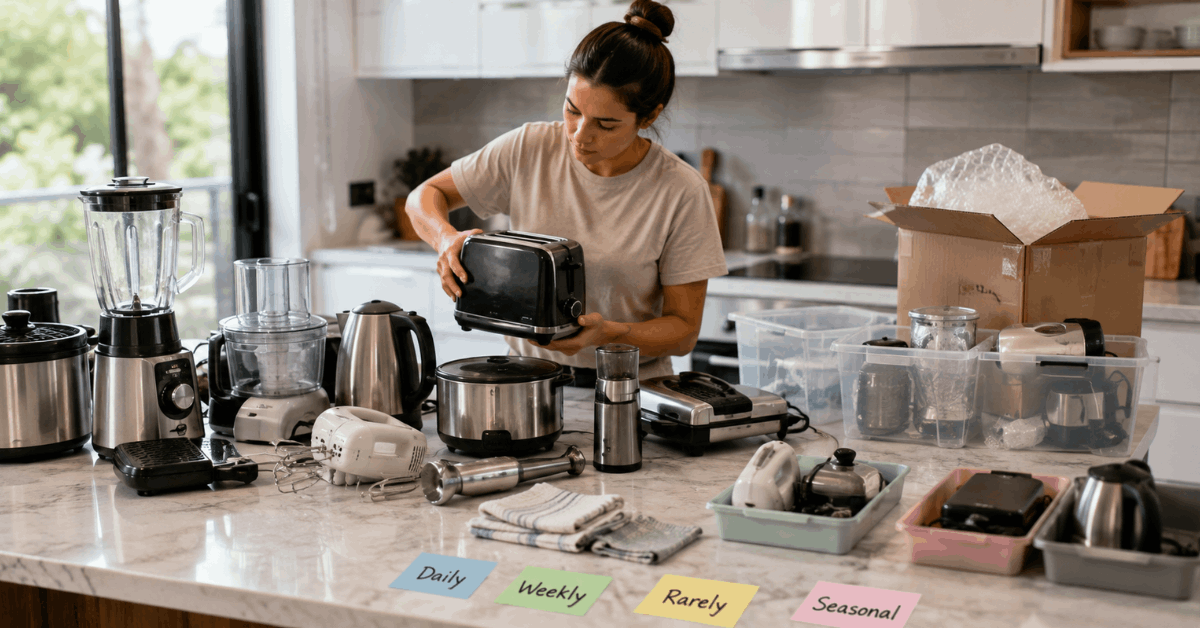
    • Sort appliances into daily, weekly, rarely used, and seasonal groups.
    • Set aside duplicate or nonfunctional gadgets for donation, recycling, or repair.

    Strategic Placement: Creating Appliance Zones

    Dedicated zones can reduce countertop clutter and support efficient routines. Match appliances with the preparation area, storage space, and nearby outlet they need.

    Frequently Used Appliances

    Daily appliances work best where they support the normal routine without blocking food preparation. Coffee makers may fit near mugs and water access, while toasters can sit near a breakfast station. 

    When comparing countertop tools, KitchenAid offers several appliance categories that can help identify which items suit regular use.

    Occasional-Use and Specialty Devices

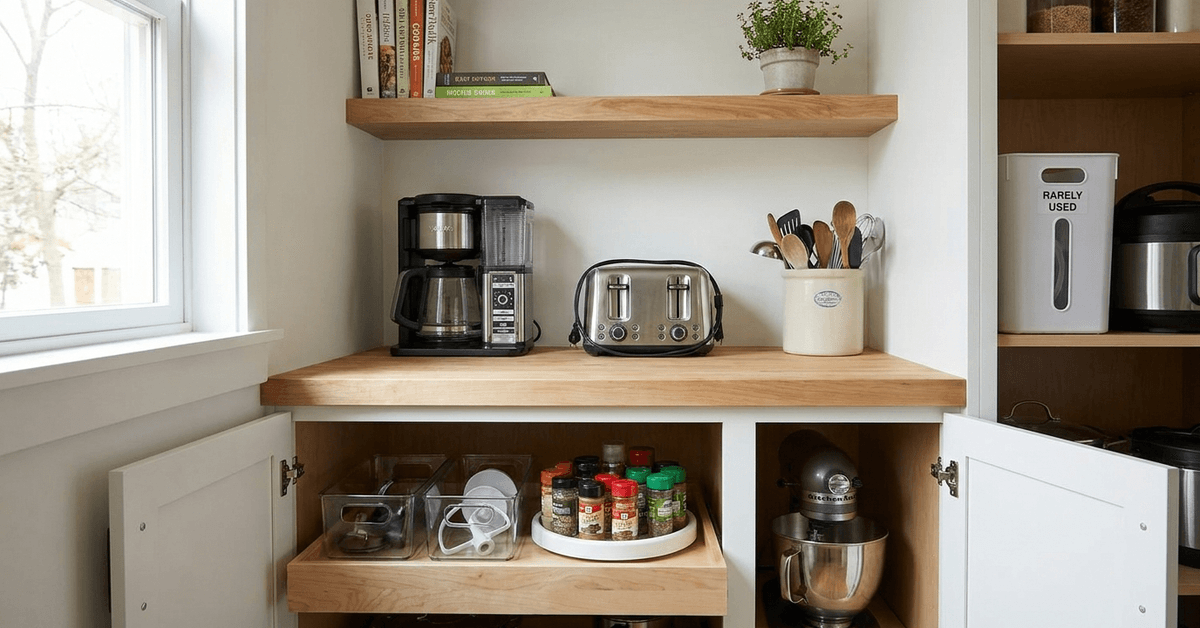
    A mixer, air fryer, or slow cooker may only be needed weekly. Storing these in a nearby cabinet or pantry keeps them accessible without taking permanent counter space. Lower shelves or sturdy pull-outs can make heavier specialty appliances easier to retrieve.

    Vertical and Corner Solutions

    Corners and vertical areas can provide extra storage potential without consuming the main work zone. Choose stable solutions that match appliance size and weight.

    • Use corner appliance shelves to utilize awkward spaces.
    • Add vertical stacking shelves for lightweight items when safely supported.

    Clever Storage Accessories for Countertop Management

    Storage accessories can organize appliances while preserving valuable surface area. Select options according to weight, cabinet dimensions, and daily accessibility.

    Pull-Out Trays and Bins

    A pull-out appliance tray can make gadgets easier to access from cabinets or deep corners. Bins can group attachments, manuals, and accessories together. Keeping related pieces in one place supports a cleaner setup.

    Lazy Susans

    A rotating tray can improve access to several small items in a deep corner. Turning the platform may be easier than moving objects from the front. Choose a stable tray with enough clearance for the stored appliances.

    Appliance Lifts

    Built-in appliance lifts can raise heavy mixers from base cabinets to working height. They can reduce repeated lifting while freeing counter space. Installation should account for cabinet strength, appliance weight, and hardware capacity.

    Optimizing Cord and Cable Management

    Loose cords can make counters look crowded and complicate surface cleaning. Simple cord-control methods keep cables organized around electrical outlets.

    Cord Wraps

    Cord wraps or clips can contain excess power cord length behind an appliance. Leave enough cable free to reach the outlet without tension. Avoid tightly bending or pinching cords around hot surfaces.

    Under-Cabinet Power Strips

    An under-cabinet power strip can reduce cables crossing preparation areas when installed appropriately. Positioning outlets near appliance zones supports a cleaner arrangement. Electrical products should always follow their ratings and safety instructions.

    Cabinet and Drawer Storage for Rarely Used Appliances

    Rarely used appliances often belong off the countertop to preserve daily work space. Cabinets, pantry shelves, and deep drawers can keep them accessible without sacrificing counter space.

    Labeled Storage Bins

    Stackable labeled bins can group small accessories and occasional-use gadgets by purpose. Clear labels make stored pieces easier to locate. Choose bins that fit shelf depth while allowing safe handling.

    Shelving Configurations

    Adjustable shelving accommodates appliances and attachments with different heights. Thoughtful arrangements also prevent small pieces from becoming difficult to find.

    • Adjust shelves to fit taller appliances without wasting vertical space.
    • Use drawer dividers for beaters, cords, blades, and removable attachments.

    Routinely Cleaning and Maintaining the Countertop

    Regular cleaning helps maintain an organized layout after appliances receive assigned locations. Moving items periodically prevents crumbs, moisture, and grease from collecting in hidden areas.

    Step-by-Step Counter Wipe-Down

    Cleaning one area at a time makes countertop maintenance easier to manage. Follow appliance instructions before moving or cleaning electrical equipment.

    • Unplug and move each appliance as appropriate.
    • Wipe underneath and around it to remove crumbs, stains, or moisture.
    • Clean trays and accessories that collect dust or grease.
    • Return appliances to assigned zones after surfaces dry.

    Cleaning Appliance Exteriors

    A damp microfiber cloth suits many appliance exteriors when manufacturer guidance permits it. Avoid soaking controls, vents, plugs, or electrical openings. Use approved cleaners and dry surfaces afterward.

    Simple Hacks to Remove Ink Stains from Fabric Quickly

    Kitchen aprons or towels may develop ink stains from pens or recipe notes. Prompt treatment can improve removal while protecting the surrounding fabric.

    Recommended Steps

    Different fabrics and inks respond differently, so check the care label first. Test unfamiliar products on a hidden area before treating the visible stain.

    • Act quickly before the stain sets further.
    • Place an absorbent paper towel beneath the stain.
    • Dab with rubbing alcohol or a suitable fabric stain remover.
    • Blot instead of rubbing to limit spreading.
    • Launder according to the care label and check before drying.

    Conclusion

    Maximizing countertop space depends on appliance use, kitchen layout, and available storage. Prioritizing daily gadgets while relocating occasional items creates a more functional workspace

    Cord organization, cleaning, and thoughtful storage accessories make the arrangement easier to maintain. With a consistent organization system, kitchen surfaces can stay ready for preparation and everyday tasks.

  • 5 Kitchen Gadgets That Actually Save Time on Meal Prep

    5 Kitchen Gadgets That Actually Save Time on Meal Prep

    Modern kitchens offer countless gadgets, but only a few consistently reduce meal prep time during everyday cooking. The best tools reduce repetitive work and keep preparation organized. 

    This guide covers five time-saving kitchen gadgets that can simplify chopping, slicing, pressure cooking, washing greens, and measuring ingredients. It also covers cleaning, storage, safety, and everyday use.

    Why Smart Kitchen Gadgets Make a Difference?

    The right tools can turn repetitive kitchen tasks into faster, simpler routines without extra clutter. Choosing gadgets that match your cooking habits can reduce manual work and improve daily meal preparation.

    5 Kitchen Gadgets That Actually Save Time on Meal Prep

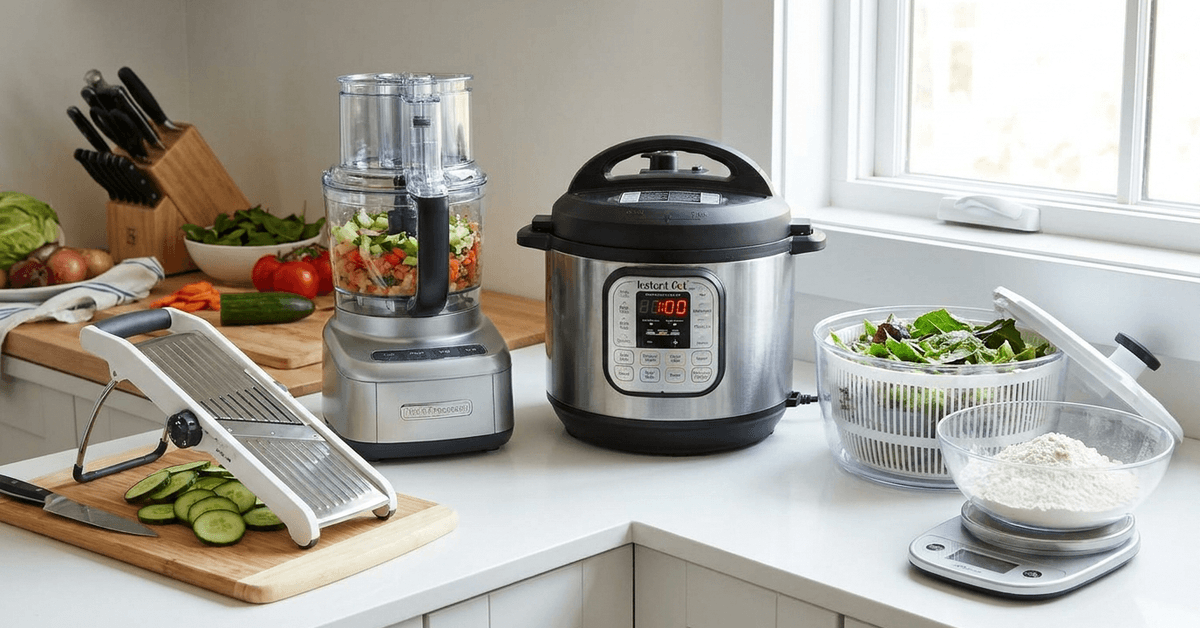
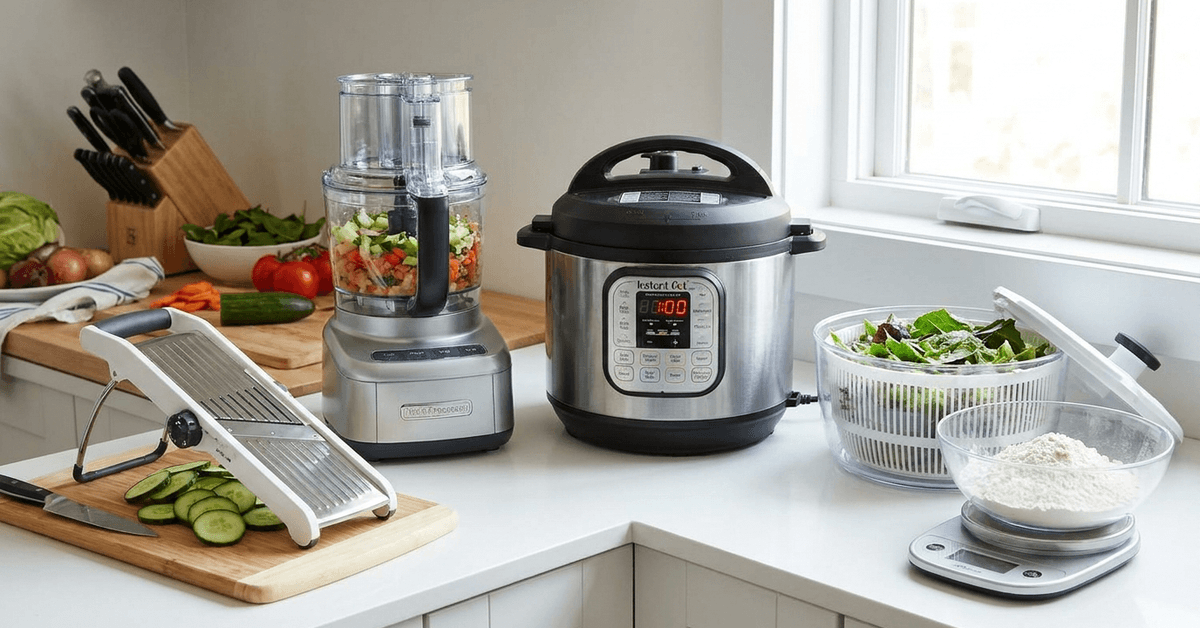
    1. Food Processor: The Multipurpose Prep Solution

    A food processor handles several repetitive tasks in one appliance. It can chop, slice, grate, mix, and blend ingredients for faster preparation.

    How a Food Processor Saves Time?

    A food processor quickly handles vegetables, cheese, herbs, sauces, and other ingredients that otherwise require repeated knife work. Interchangeable blades support several prep tasks.

    • Chops vegetables and fruits into relatively uniform pieces.
    • Mixes sauces, dips, dressings, and some doughs.
    • Grates cheese and shreds vegetables quickly.
    • Processes larger batches without repeated knife work.

    Cleaning and Organization Tips

    Cleaning immediately keeps food from drying onto blades, bowls, and lids. Organized storage protects sharp attachments and keeps the processor accessible.

    5 Kitchen Gadgets That Actually Save Time on Meal Prep
    • Rinse removable parts soon after use.
    • Hand-wash sharp blades carefully when needed.
    • Dry bowls, lids, and blades before storage.
    • Keep blade attachments in a dedicated organizer.

    2. Mandoline Slicer: Precise and Ultra-Fast Slicing

    A mandoline creates even slices quickly for larger amounts of produce. It works well for potatoes, cucumbers, and zucchini where uniform thickness supports even cooking.

    Time-Saving Benefits of a Mandoline

    The fixed blade reduces repeated knife movements and creates consistent slices across larger batches. This makes it useful for salads, gratins, and slaws.

    • Slices produce to a consistent thickness.
    • Reduces prep time for recipes requiring many slices.
    • Creates thin pieces that cook more evenly.
    • Speeds up repetitive slicing for large recipes.

    Safety Precautions and Maintenance

    The exposed blade is extremely sharp, so safe handling matters every time the mandoline is used. A hand guard helps reduce accidental contact.

    • Always use the provided food holder or hand guard.
    • Keep fingers away from the blade path.
    • Clean the blade carefully after use.
    • Dry the slicer before placing it in storage.
    • Store it with a blade cover or protective sleeve.

    3. Electric Pressure Cooker: From Stews to Rice in Less Time

    Electric pressure cookers combine several cooking functions in one countertop appliance. They are useful for longer-cooking foods and simplify hands-off preparation.

    How Pressure Cooking Streamlines Meal Prep

    Pressure cooking can shorten cooking for beans, stews, grains, and tougher meats. Programmable controls free cooks for other kitchen tasks.

    • Pressure-cooks beans, stews, rice, and meats.
    • Offers preset or programmable cooking functions.
    • Combines pressure cooking with functions such as sautéing or slow cooking.
    • Reduces separate cookware for some one-pot meals.

    The official Instant Pot Duo 6QT Multi-Use Pressure Cooker combines pressure cooking, slow cooking, rice cooking, steaming, sautéing, yogurt making, and warming in one appliance. Its multi-use design shows why one cooker can replace several tools for some recipes.

    Practical Tips for Quick Turnaround

    Preparing ingredients first reduces interruptions during cooking. Keeping the sealing components and inner pot clean also supports reliable everyday operation.

    • Prep vegetables and proteins in batches.
    • Wash the inner pot after each use.
    • Check removable valves and seals for food residue.
    • Clean the lid and sealing ring according to manufacturer instructions.

    4. Salad Spinner: Faster Greens With Less Mess

    A salad spinner combines rinsing and drying, making leafy-green preparation quicker. Removing excess water also supports crisper prepared greens.

    Ways a Salad Spinner Saves Time

    The spinning basket removes water faster than repeatedly patting greens dry with towels. The bowl also contains splashes during rinsing and spinning.

    • Dries lettuce and herbs quickly.
    • Contains water inside the bowl during spinning.
    • Helps prepare greens for storage after washing.
    • Can also rinse some berries and delicate vegetables.
    • Reduces the number of towels needed for drying.

    Maintenance and Storage Insights

    Separating the bowl, basket, and lid makes cleaning and drying more thorough. Complete drying helps prevent trapped moisture and odors during storage.

    • Take components apart after use.
    • Wash according to product-care instructions.
    • Let all pieces air-dry completely.
    • Reassemble only when every component is fully dry.
    • Store lightweight items inside the spinner when practical.

    5. Digital Kitchen Scale: Accuracy Without Guesswork

    A digital kitchen scale speeds up ingredient measurement by weighing directly into a bowl or container. It is useful for baking, portioning, and recipes using grams or ounces.

    Time Savings With Digital Measurement

    Using the tare function allows several ingredients to be measured in the same bowl. This reduces repeated measuring-cup use and supports consistent recipe quantities.

    • Measures ingredients directly by weight.
    • Reduces the number of cups and spoons needed.
    • Simplifies doubling or dividing recipes.
    • Helps divide batch-cooked meals into even portions.
    • Supports precise measurements for baking.

    Practical Organization and Upkeep

    Digital scales work best on a flat surface and should be protected from moisture, impact, and excessive weight. Simple maintenance protects sensor accuracy.

    • Store the scale flat when possible.
    • Wipe the platform with a lightly damp cloth.
    • Keep water away from buttons and battery compartments.
    • Replace batteries when the display becomes weak.
    • Avoid placing loads above the rated capacity.

    Choosing and Integrating Time-Saving Gadgets Into Daily Routines

    Time-saving gadgets work best when they support tasks you perform regularly. Review your cooking workflow to identify repetitive chopping, cooking, measuring, or cleanup needs. 

    Keep frequently used tools accessible and store rarely used gadgets farther away. Consider storage, safety, and cleanup time when deciding whether an appliance truly improves daily convenience.

    Conclusion: Making Meal Prep Faster With Gadgets That Work

    A food processor, mandoline slicer, electric pressure cooker, salad spinner, and digital kitchen scale can each reduce repetitive kitchen work. Their usefulness depends on your cooking style, storage space, and meal-prep habits

    Proper cleaning and accessible storage make each gadget easier to use consistently. With a thoughtful kitchen setup, a small collection of practical tools can make everyday meal preparation faster and more organized.

  • How to Use an Instant-Read Meat Thermometer for Perfect Results

    How to Use an Instant-Read Meat Thermometer for Perfect Results

    Cooking meat to the right temperature helps avoid unsafe or overcooked results. An instant-read thermometer provides a quick way to check doneness without relying only on appearance.

    This guide explains safe temperatures, probe placement, calibration, and cleaning. It also covers common mistakes and consistent cooking habits.

    Understanding Instant-Read Meat Thermometers

    An instant-read thermometer measures the internal temperature of food through a metal probe. Understanding its designs and parts supports correct use.

    How to Use an Instant-Read Meat Thermometer for Perfect Results

    Main Types of Instant-Read Thermometers

    Digital and dial thermometers offer different reading speeds and operating styles. Both work well when used according to instructions.

    • Digital probe thermometers: Fast readings with battery power.
    • Dial analog thermometers: Battery-free with slower response.

    Key Components That Matter

    The probe, display, and controls determine how easily the thermometer provides an accurate reading. Keeping these main parts clean supports reliable use.

    • Probe tip: Reaches the meat center.
    • Display screen: Shows temperature.
    • Power button and battery cover: Control digital models.

    Why Accurate Temperature Matters for Cooking Meat?

    Temperature checking supports food safety while reducing unnecessary overcooking. Appearance alone cannot reliably confirm the internal temperature of meat.

    Food Safety Standards

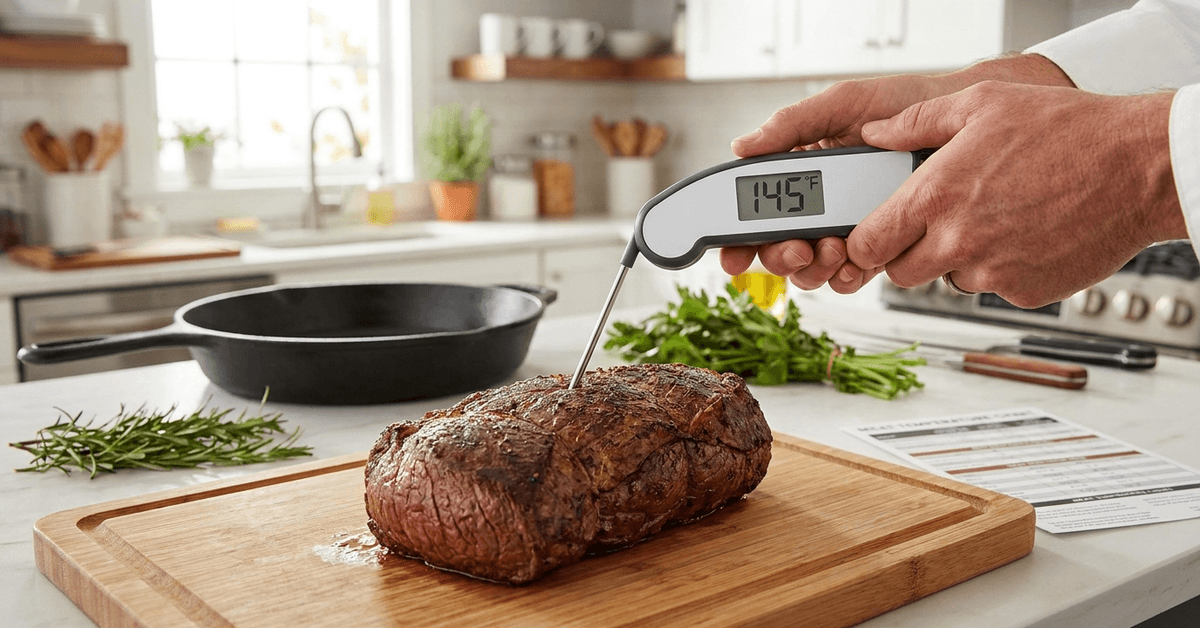
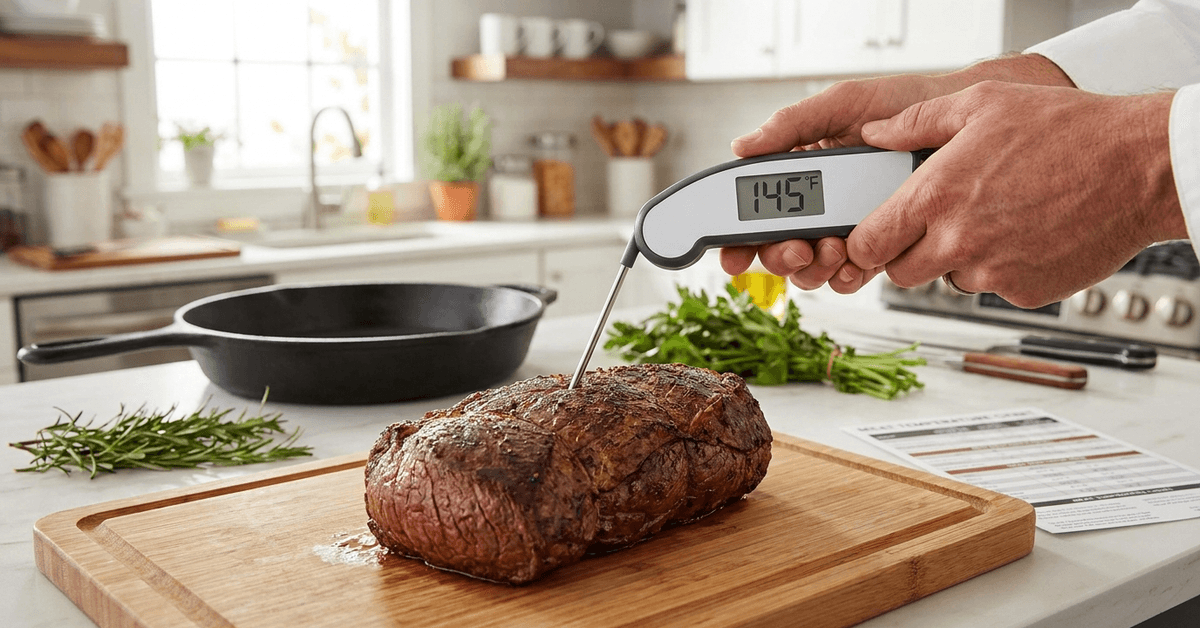
    Safe minimum temperatures vary by meat type, so use the right temperature target. USDA guidance also requires a three-minute rest after whole cuts of beef and pork reach 145°F (63°C).

    • Chicken and poultry: 165°F (74°C).
    • Beef steaks and roasts: 145°F (63°C), plus three minutes of rest.
    • Ground beef, pork, lamb, and veal: 160°F (71°C).
    • Pork chops and roasts: 145°F (63°C), plus three minutes of rest.

    How to Use an Instant-Read Meat Thermometer Efficiently?

    Good technique improves temperature accuracy and limits unnecessary heat loss. Preparing it first keeps the checking process quick.

    Preparation Before Cooking

    A clean thermometer should be ready before meat nears completion. Basic preparation steps also support hygiene.

    • Choose a thermometer that feels secure.
    • Clean the probe tip before use.
    • Dry the probe completely.
    • Check battery power.

    Measuring Internal Meat Temperature

    Probe position matters because different areas can reach different temperatures. Measure the thickest section while avoiding bone and the pan.

    1. Insert the probe into the thickest part.
    2. Avoid bone, fat, gristle, or the pan.
    3. Wait until the display reading stabilizes.
    4. Check another spot on large cuts if needed.
    5. Compare with the safe minimum temperature.

    After Each Use

    Cleaning after every check reduces cross-contamination risk between foods. Many thermometer bodies should not be fully submerged.

    • Wash the metal probe with mild soap and warm water.
    • Keep water away from non-waterproof electronics.
    • Sanitize after raw poultry or ground meat.
    • Dry completely before storage.

    Special Tips for Accurate Results

    Small technique changes can improve measurement consistency during cooking. These habits help with irregular cuts.

    Placement Is Everything

    For thick meat, aim for the deepest central area without touching bone. Thin cuts are easier to measure from the side. Another spot can reveal uneven cooking.

    Timing Your Read

    Allow time for the reading to stabilize before removing the probe. Response time differs by model. Checking near the end of cooking also limits repeated heat loss.

    Keeping Multiple Thermometers

    A second thermometer can serve as a backup tool during large meals. It can also confirm an unexpected reading. Both need the same cleaning and calibration care.

    Calibration and Maintenance for Reliable Use

    Periodic checks help confirm that the thermometer remains reasonably accurate. Calibration and storage should match the specific model.

    Checking Accuracy

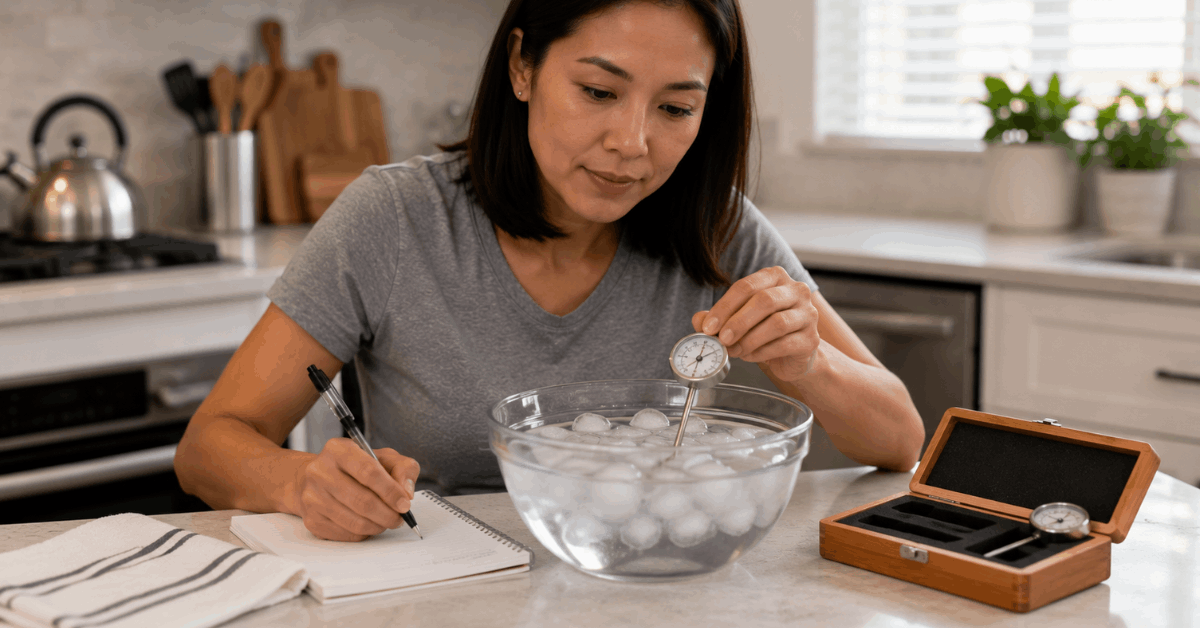
    Many thermometers can be checked with an ice-water test when allowed. Adjustment procedures differ, so use the correct method.

    How to Use an Instant-Read Meat Thermometer for Perfect Results
    • Use the manufacturer’s recommended accuracy check.
    • Use ice water when permitted.
    • Adjust analog models only as directed.
    • Reset digital models only when supported.

    Storage Practices

    Proper storage protects the probe tip from bending and contamination. Keep the thermometer dry and accessible.

    • Use the protective sheath when provided.
    • Store away from heat or moisture.
    • Keep digital areas dry.

    Common Mistakes and Troubleshooting

    Most inaccurate readings come from poor placement or incorrect use. Checking common problems can restore reliable measurements.

    Frequent Issues in Measurement

    Small errors can make the thermometer read the wrong temperature zone. Review placement when results seem inconsistent.

    • Testing against bone or the pan
    • Inserting the probe too shallowly
    • Using a dirty or damaged probe
    • Reading before stabilization
    • Using a weak battery

    Small Fixes

    If a reading seems wrong, clean the probe and test a different location. Confirm accuracy with the approved method and replace weak batteries. Persistent errors may mean replacement is needed.

    Cleaning and Maintenance for Appliance Longevity

    Routine care protects against food residue and moisture. Gentle cleaning keeps the probe ready for repeated temperature checks.

    Step-by-Step Cleaning Routine

    Clean soon after use so residue does not dry onto the probe. Keep liquids away from electronics unless the model allows water exposure.

    1. Switch off the thermometer.
    2. Wash the metal probe with mild soap.
    3. Use a soft cloth or sponge.
    4. Wipe the handle lightly when permitted.
    5. Sanitize when necessary.
    6. Dry thoroughly.

    Replacement Tips

    Thermometers can wear over time, especially if probes bend or displays become unreliable. Slow or inconsistent readings can indicate device wear. Replace the thermometer when maintenance no longer restores dependable performance.

    Comparing Instant-Read to Other Meat Thermometers

    Instant-read and leave-in thermometers serve different cooking purposes. The difference helps cooks choose the right thermometer.

    Leave-In vs. Instant-Read

    Leave-in models monitor food continuously, while instant-read models provide short spot checks. Use each according to its intended design.

    • Leave-in thermometers: Remain in suitable food during cooking.
    • Instant-read models: Are inserted briefly near the end.

    A product such as the ThermoWorks Thermapen ONE is an example of a dedicated instant-read thermometer. Always follow the product instructions for use and cleaning.

    Smart Kitchen Routines for Meat Thermometer Users

    Building it into meal prep makes temperature checking easier. A consistent setup supports cleaner, more organized cooking.

    Routine Building

    Preparing the thermometer early keeps it nearby as meat nears completion. Simple kitchen habits make checks faster.

    • Set out the thermometer before cooking.
    • Keep the probe clean.
    • Check several pieces when sizes vary.
    • Record preferred temperatures while meeting safety guidance.

    Sanitizing Surfaces

    Wash hands and clean surfaces after contact with raw meat juices. Keep the clean thermometer away from contaminated utensils. These hygiene habits reduce cross-contamination after cooking.

    Conclusion: Mastering Instant-Read Meat Thermometers for Reliable Results

    An instant-read thermometer checks meat more reliably than appearance alone. Correct probe placement, safe targets, and regular cleaning support reliable results. 

    Calibration checks and careful storage keep the tool dependable. With a consistent routine, temperature checking becomes a simple part of safer cooking.

  • Airfryer vs Convection Oven: Which Is More Energy-Efficient

    Airfryer vs Convection Oven: Which Is More Energy-Efficient

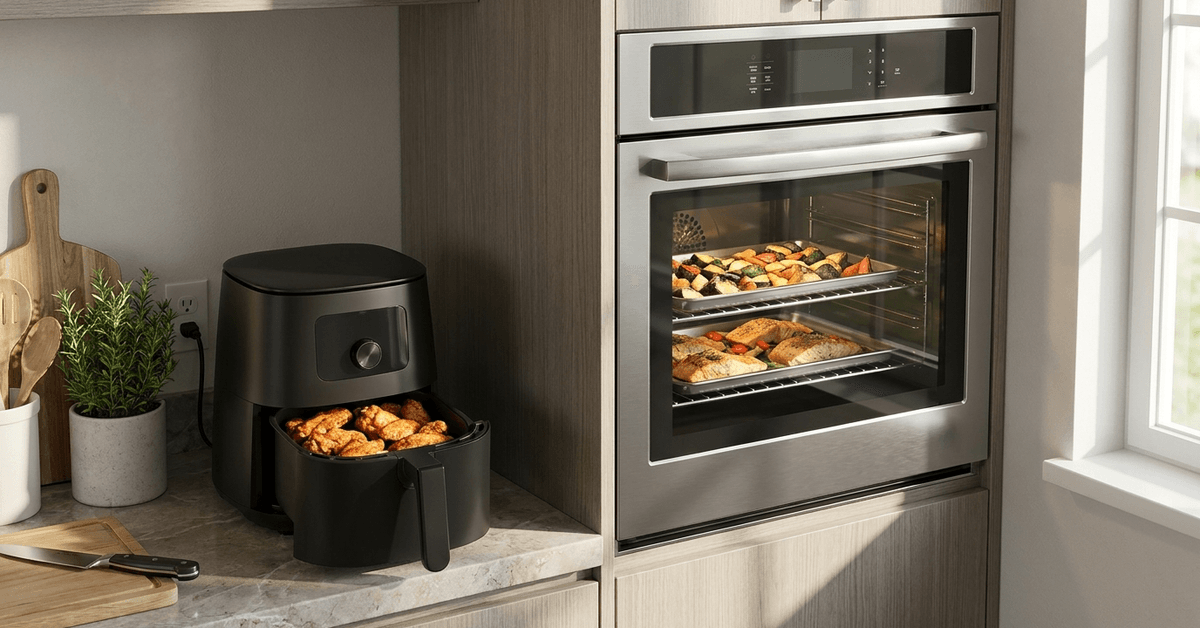
    Choosing between an airfryer and a convection oven often comes down to energy use and everyday cooking needs. Both appliances circulate hot air, but their size and operating patterns differ. 

    This guide compares power consumption, cooking time, batch capacity, maintenance, and typical household costs. It also explains which appliance may deliver better efficiency for different meal sizes and routines.

    Understanding How Each Appliance Works

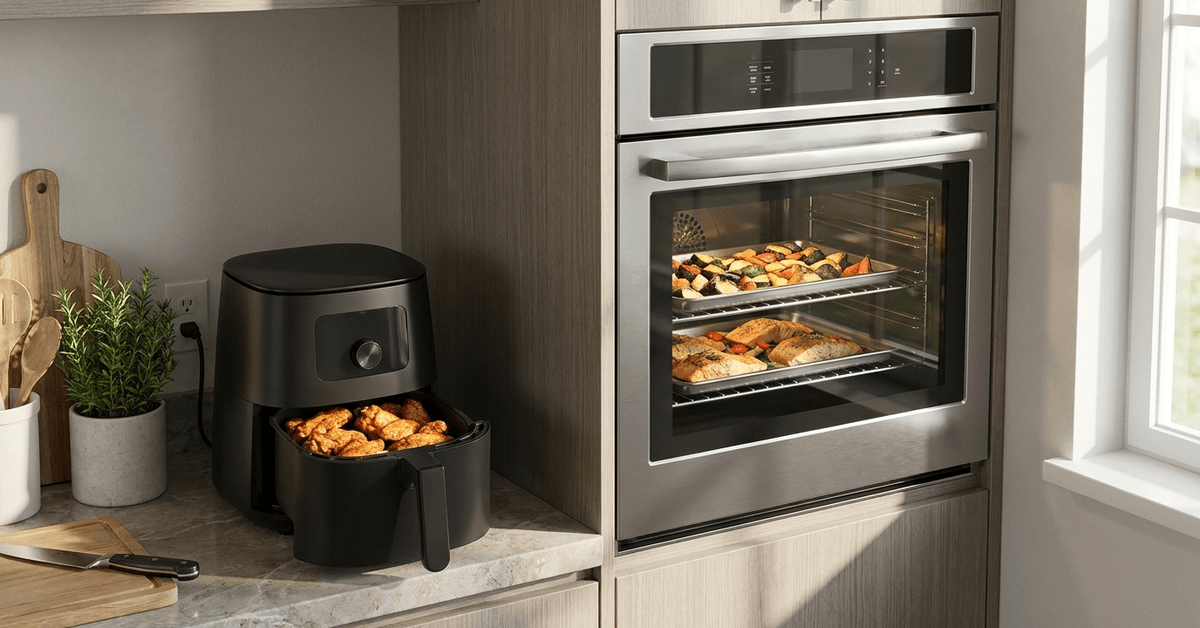
    Both appliances rely on moving hot air to cook food more evenly than still-air methods. Their biggest design difference is the size of the cooking chamber and how quickly that space heats.

    Airfryer vs Convection Oven: Which Is More Energy-Efficient

    How Airfryers Circulate Heat?

    Airfryers combine a heating element with a high-speed fan inside a compact cooking chamber. Hot air moves rapidly around food held in a perforated basket, helping exposed surfaces brown and crisp. 

    The smaller chamber generally reaches cooking temperature quickly, supporting shorter cooking cycles for modest portions.

    How Convection Ovens Cook

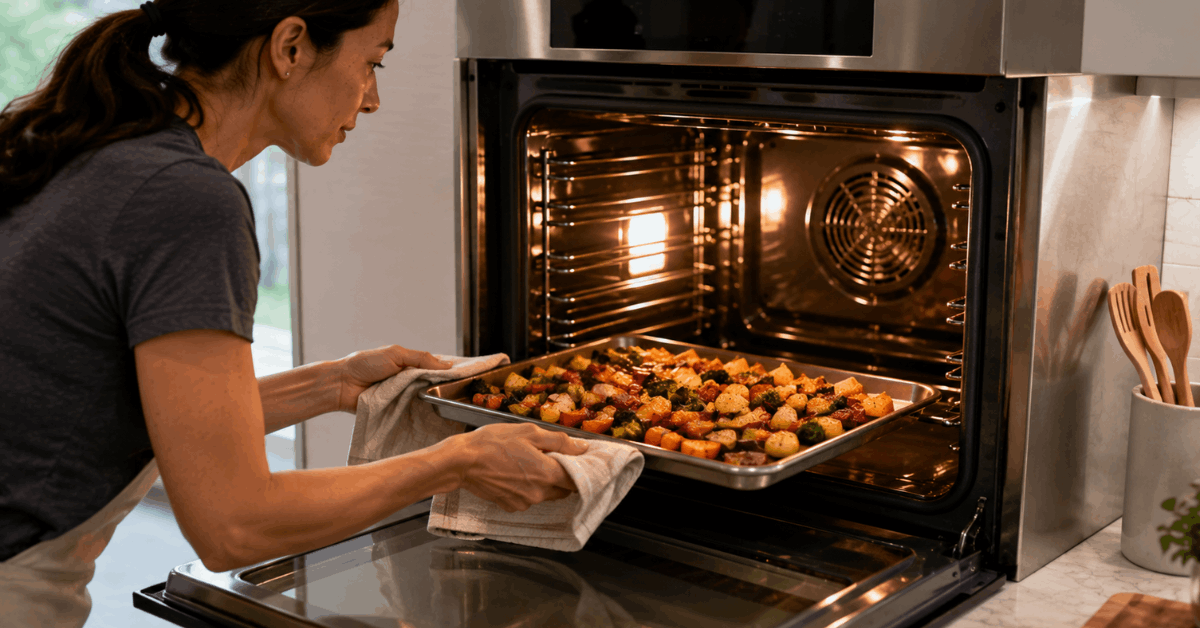
    Convection ovens use an oven heating system plus a fan to distribute heated air throughout a larger cavity. Their spacious interiors can accommodate multiple dishes or trays at the same time. 

    Because more space must be heated, preheating time can become a larger part of energy use for small meals.

    Electricity Consumption and Typical Wattage

    Rated wattage shows how much power an appliance can draw while operating, but total energy use also depends on runtime. Comparing wattage and duration provides a more useful picture than looking at wattage alone.

    Airfryer Energy Usage

    Many airfryers operate between roughly 800 and 2,000 watts, depending on size and features. A standard 4-quart model may draw about 1,400 watts while cooking for 15 to 25 minutes. 

    Shorter runtimes and a smaller heated space can make airfryers efficient for single servings or smaller batches.

    Convection Oven Energy Patterns

    Convection ovens commonly use more power because they heat a larger oven cavity. A mid-size electric model may draw around 2,400 watts, while larger units can use more depending on settings. 

    Airfryer vs Convection Oven: Which Is More Energy-Efficient

    Preheating for 10 to 15 minutes can increase total energy use when only a small amount of food is being prepared.

    Real-World Cooking Efficiency

    Energy efficiency changes with the amount of food being cooked and how fully the appliance is used. Small meals often favor an airfryer, while larger batches can make better use of a convection oven.

    Batch Cooking: Family Meals vs. Singles

    Airfryers are especially practical for single portions or small meals because little empty space is heated. 

    Convection ovens become more competitive when several trays or a larger family meal cook together. Using the full available capacity helps spread energy consumption across more servings.

    Cooking Time Comparison

    Cooking times vary by appliance, food size, and temperature, but airfryers often finish small portions more quickly. The following examples illustrate typical differences rather than guaranteed times.

    • Chicken wings: Airfryer, about 22 minutes; convection oven, about 30–35 minutes
    • Frozen fries: Airfryer, about 16 minutes; convection oven, about 25 minutes
    • Baked fish: Airfryer, about 14 minutes; convection oven, about 22 minutes

    Factors That Affect Energy Efficiency

    Appliance efficiency depends on more than the wattage printed on the label. Preheating, batch size, food arrangement, and cooking frequency all influence real household consumption.

    Preheating Requirements

    Convection ovens commonly need more time to bring the full cavity to the target temperature. Some airfryers require little or no preheating for certain foods because the chamber is smaller. Skipping or shortening this stage can reduce overall cooking time for quick meals.

    Batch Size and Fill Rate

    A convection oven can be efficient when several portions cook during one full-capacity session

    An overcrowded airfryer, however, may block airflow and extend the cooking cycle. Leaving enough room around food supports consistent circulation and avoids repeated batches.

    Lifespan, Maintenance, and Appliance Costs

    Energy use is only one part of long-term value because maintenance and replacement also affect household costs. Keeping airflow components clean helps both appliances perform as intended.

    Airfryer Durability Tips

    Regular cleaning helps prevent grease from interfering with baskets, heating areas, and airflow. These basic habits support reliable performance and protect removable surfaces.

    • Clean the basket after regular use to prevent oil buildup.
    • Avoid metal utensils on nonstick surfaces.
    • Inspect the heating area for loose food debris.
    • Keep vents free from grease and dust.

    For an example of a current model, Philips offers a 2000 Series Airfryer with a compact 4.2-liter cooking chamber and RapidAir technology. This illustrates how compact appliance design supports quick countertop cooking.

    Convection Oven Care Guidelines

    Convection ovens benefit from keeping the cavity, fan area, and door seal free from heavy buildup. Regular inspection helps limit avoidable heat loss during cooking.

    • Wipe the oven cavity after spills have cooled.
    • Keep the convection fan area free from visible debris.
    • Inspect door seals for damage or gaps.
    • Avoid blocking interior airflow with oversized cookware.

    Cost of Use: An Energy Bill Perspective

    Electricity cost depends on the appliance wattage, cooking time, and your local utility rate. A short airfryer cycle may cost less than heating a large oven for one small dish.

    The original comparison estimates about $0.18 for a typical airfryer meal and roughly $0.24 to $0.32 for a similar convection-oven task. For large family meals, one full oven cycle may cost less than running several separate airfryer batches.

    Key Points for Choosing the Right Appliance

    The most efficient choice depends on how much food you normally prepare and how quickly you need it. Consider batch size, kitchen space, and maintenance alongside energy use.

    • Airfryer: Strong choice for small portions, quick cooking, and minimal preheating.
    • Convection oven: Better suited to large meals and multi-tray cooking.
    • Compare rated wattage and normal cooking time for your favorite recipes.
    • Consider whether several airfryer batches would be needed.
    • Factor in available counter or cabinet space.
    • Maintain either appliance so airflow remains unobstructed.

    Conclusion

    Airfryers often provide better energy efficiency for quick, small-batch cooking because they heat a compact chamber for a shorter period. Convection ovens can become more efficient per serving when their larger capacity is used for family meals or multiple dishes. 

    Preheating, cooking time, food arrangement, and maintenance all influence real electricity use. Choosing according to everyday cooking habits offers the most practical balance of efficiency, convenience, and meal capacity.